1. Unlock and Trust Device
Some devices like iPhone come with an added layer of authentication to verify user identity. When you connect iPhone for the first time to a computer, you need to unlock it. iOS will ask you to trust the connected device. Once you authenticate, you will see the iPhone content appearing on the PC.
Speaking of Android phones, when you connect an Android device with a computer, it goes into charging mode. You need to change the status to Transfer Files from the Settings to view Android file manager on PC.
2. Clean USB Port
Over time, your computer’s USB port might get jammed with dust and other particles. When you plug a USB device, Windows 11 will continue to face problems recognizing the connected devices. Use a microfiber cloth or a paint brush to clean the USB port and try again.
3. Try Another USB Port
While laptops these days have one or two USB ports, your PC does have three or four USB ports. If Windows 11 is not recognizing USB devices from one port, you can always try another port. If you are dealing with a Type-C port on a laptop, you can use a dongle and connect the USB device.
When your Windows 11 PC fails to recognize the wired mouse, try using a USB hub to connect it.
4. Change Power Management Settings
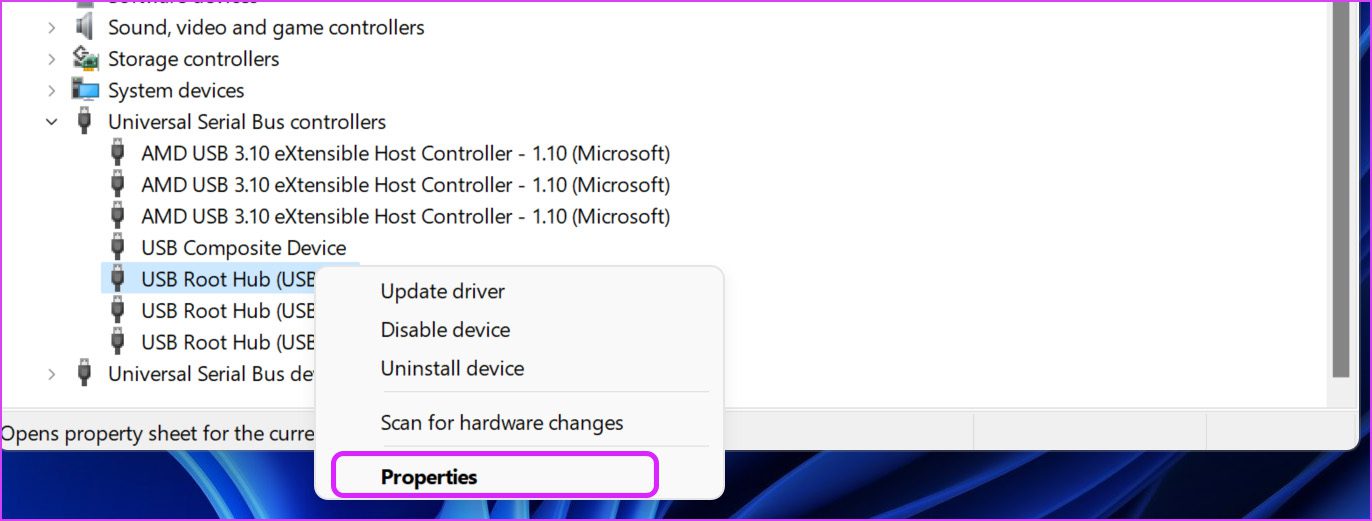
By default, Windows 11 suspends the USB device operations in the background to save power, especially on laptops. You can disable the tweak from the Device Manager menu. Step 1: Right-click on the Windows key and open the Device Manager menu.
Step 2: Find the USB device from the list and right-click on it. Step 3: Select Properties from the context menu.
Step 4: Go to the Power menu. Step 5: Disable the ‘Allow the computer to turn off this device to save power’ option.
Hit OK and you are all set to use the connected USB device on the PC.
5. Reinstall USB Drivers
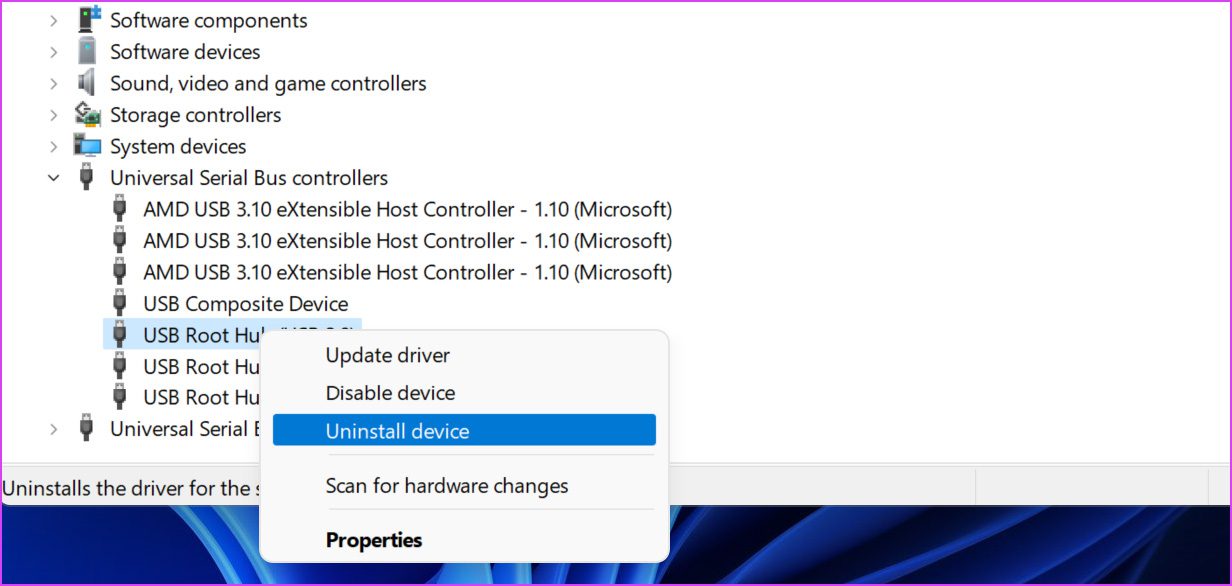
Buggy USB drivers on your Windows 11 PC can lead to problems with recognizing USB devices. You need to uninstall the USB drivers from the Device Manager menu. Follow the steps below. Step 1: Right-click on the Windows key and select Device Manager.
Step 2: When it opens, scroll down to the Universal Serial Bus Controllers section to find the ‘USB Root Hub device’ and right-click on it. Step 3: Select Uninstall Drivers and choose ‘Yes.’
Restart your PC and wait for Windows 11 to automatically install the required drivers after plugging the USB device.
6. Disable USB Suspend Settings
This is yet another setting tweak that can affect USB operations on Windows. To reduce battery usage, Windows 11 suspends USB operations after a while. Let’s change the behavior. Step 1: Press the Windows key, type ‘edit power plan,‘ and hit Enter. Windows will open Power options in the Control Panel. Step 2: Select Change advanced power settings.
Step 3: Scroll down to USB settings and select USB selective suspend setting. Step 4: Disable the service from the drop-down menu and hit OK.
7. Scan Windows PC
Malicious files on your Windows 11 PC can get you in trouble with USB devices. You can run the Windows Security tool scan for such files and remove them. Step 1: Press the Windows key, type Windows Security, and hit Enter to open the app. Step 2: Go to Virus & threat protection menu. Step 3: Run a quick scan.
You can minimize the app and continue with your work.
8. Update Windows 11
Windows 11 not recognizing USB devices might be a bug in the OS build on your PC. You can head to Windows Settings (use Windows + I keys) and open the Windows Update menu. Download and install the latest available build version. Then, restart the PC for a successful installation.
Use USB Devices on Windows 11
Although we have a wireless keyboard and mouse at the office, we prefer the USB connection for a lag-free experience. The same stays true when transferring files from iPhone or Android to PC or vice versa. Offline file transfer via USB connection beats cloud solutions like OneDrive or Google Drive. Windows 11 failing to recognize USB devices may leave you in confusion, and you may end up using other unconventional methods to get the job done. The tricks above will help you fix the issue in five to ten minutes. The above article may contain affiliate links which help support Guiding Tech. However, it does not affect our editorial integrity. The content remains unbiased and authentic.