Thankfully, there are many things you can do to fix WhatsApp notifications on Windows. In this post, we’ll walk you through all of them. So, let’s get going.
1. Verify In-App Notification Settings
First, check WhatsApp’s in-app settings to ensure that notifications are not disabled. Here’s how to do it. Step 1: Open WhatsApp on your PC. Step 2: Click the gear-shaped icon on your left.
Step 3: Navigate to the Notifications tab. Then, enable the toggles next to ‘When new messages are received’ and ‘When WhatsApp is closed.’
2. Enable WhatsApp Notifications From the Settings App
Windows 11 lets you enable or disable notifications for each app individually. If you’ve accidentally turned off notifications for WhatsApp, here’s how you can re-enable them. Step 1: Open the Start menu and click the gear-shaped icon to launch the Settings app.
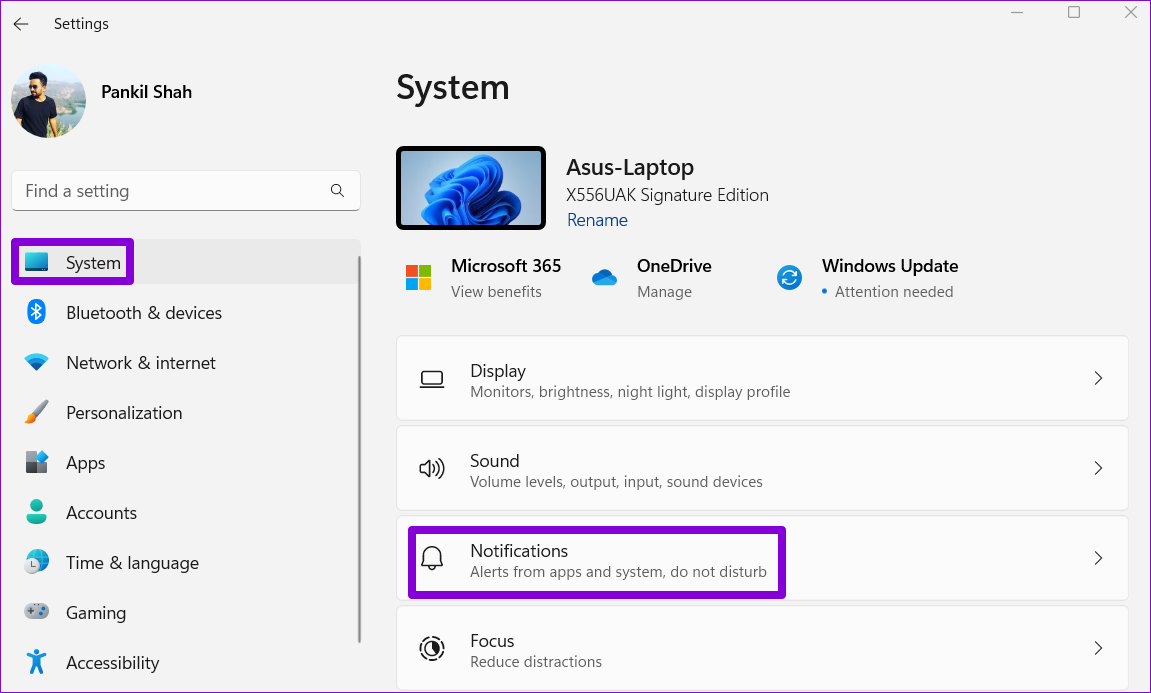
Step 2: In the System tab, click on Notifications.
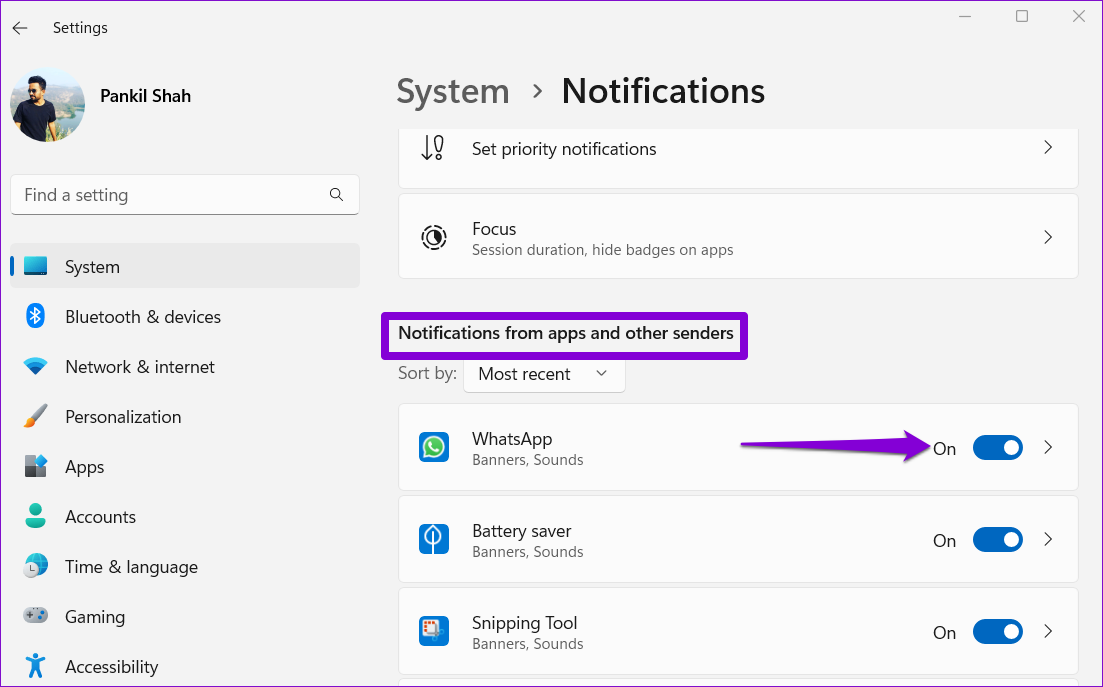
Step 3: Under ‘Notifications from apps and other senders’, locate WhatsApp on the list and enable the switch next to it.
Following this, WhatsApp will show notifications for any new messages you receive.
3. Allow WhatsApp to Run in the Background
Another reason WhatsApp may fail to send notifications is if it does not have permission to work in the background. In that case, you won’t get any alerts for messages or calls unless the WhatsApp stays open on your computer. To change background app permissions for WhatsApp, use the following steps. Step 1: Right-click on the Start icon and select Settings from the list.
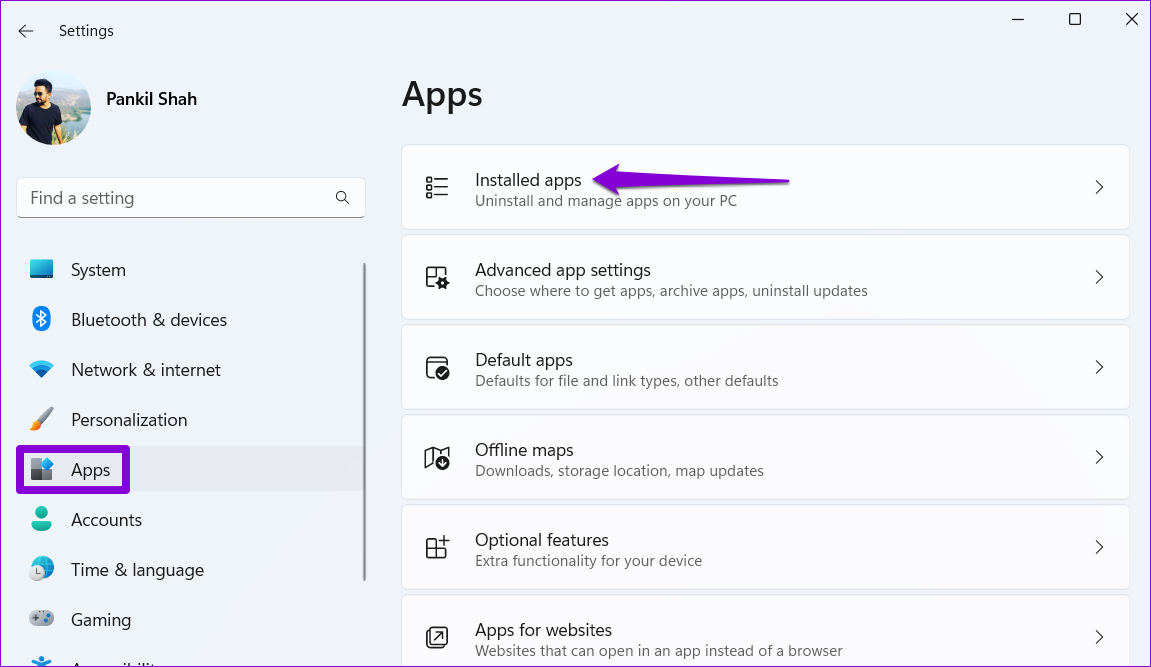
Step 2: Navigate to the Apps tab on your left and click on Installed apps.
Step 3: Scroll down or use the search bar at the top to locate WhatsApp on the list. Click the three-dot menu next to it and select Advanced options.
Step 4: Under Background apps permissions, use the drop-down menu to select Always.
4. Check for Muted Conversations
Have you muted any of your contacts or chat groups? If so, WhatsApp will not show you notifications for those specific contacts and groups. Open WhatsApp on your PC and look for chats that have a mute speaker icon next to them. Right-click on the conversation you want to unmute, go to Muted and select Unmute.
Repeat this step to unmute all contacts and chat groups for which notifications are not working.
5. Remove Linked Device and Add It Again
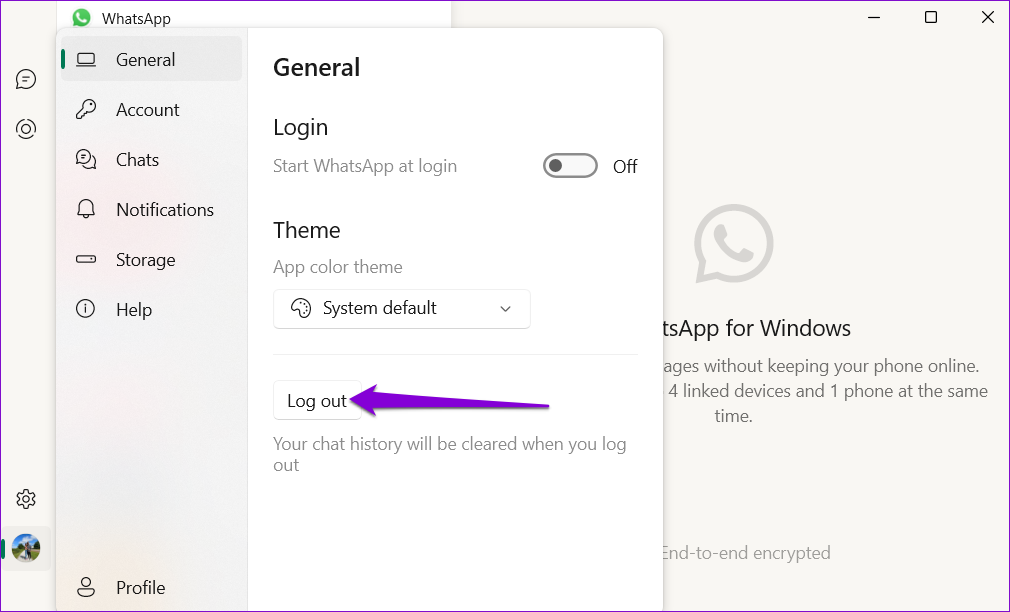
If WhatsApp still fails to show notifications on Windows 11, you can try removing your linked device and add it again. Here’s how to do it. Step 1: Open WhatsApp on your PC. Click on your profile picture in the bottom left corner.
Step 2: In the General tab, click on Log out.
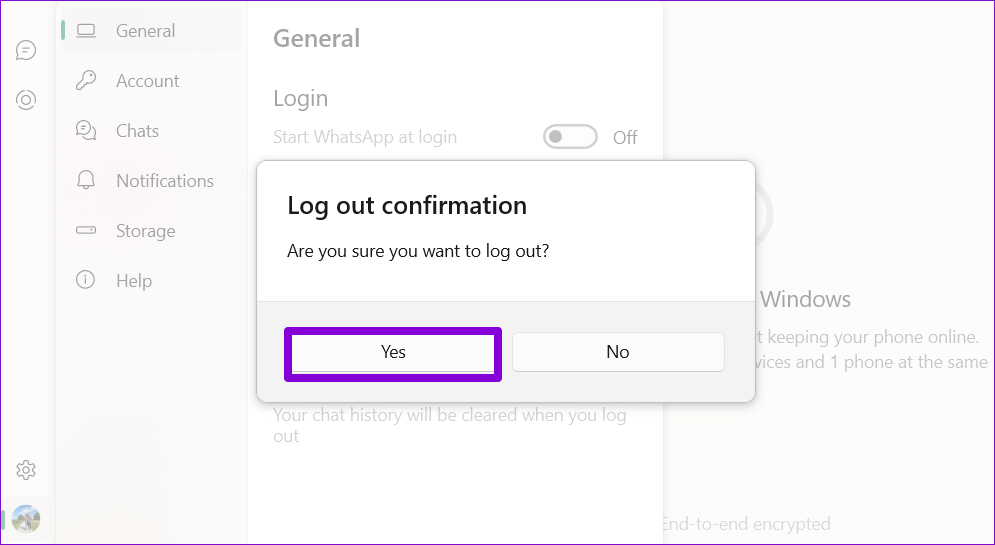
Step 3: Select Yes to confirm.
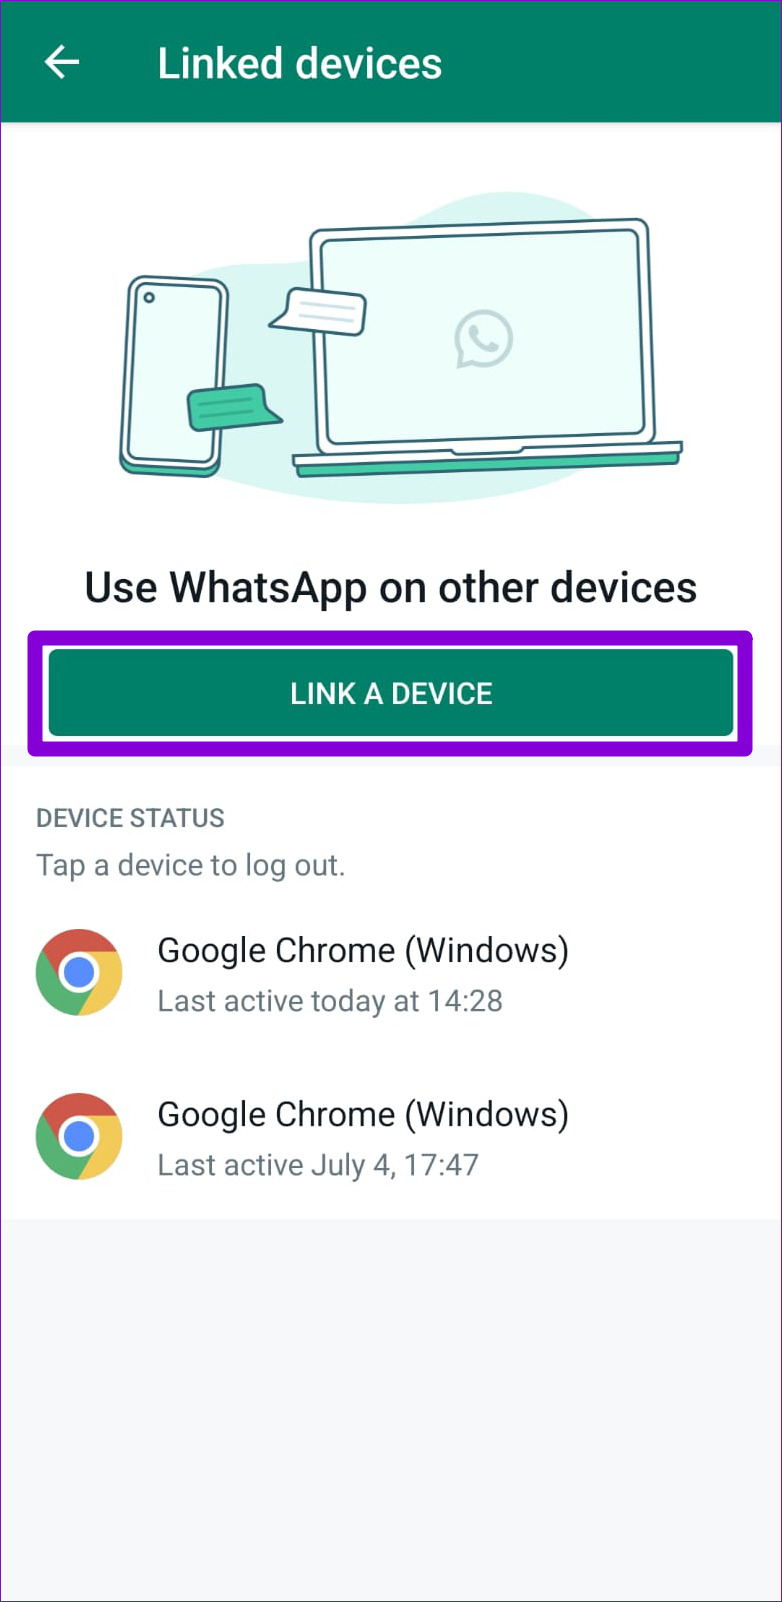
Step 4: Next, open WhatsApp on your phone. Tap the three-dot menu icon in the top-right corner and select Linked devices from the menu that appears.
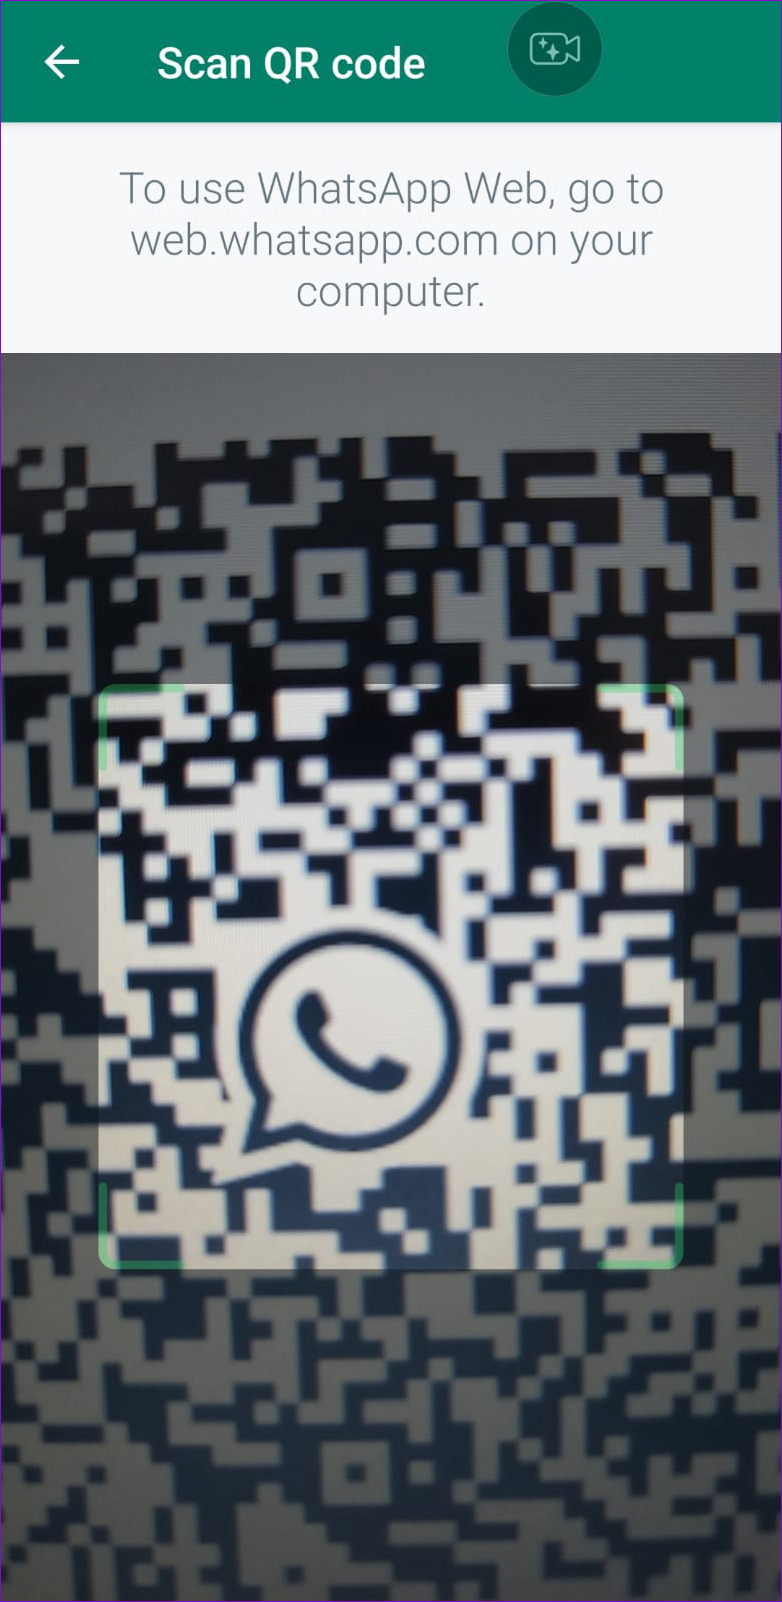
Step 5: Tap on ‘Link a Device’ button and use your phone’s camera to scan the QR code on your PC.
6. Repair or Reset WhatsApp
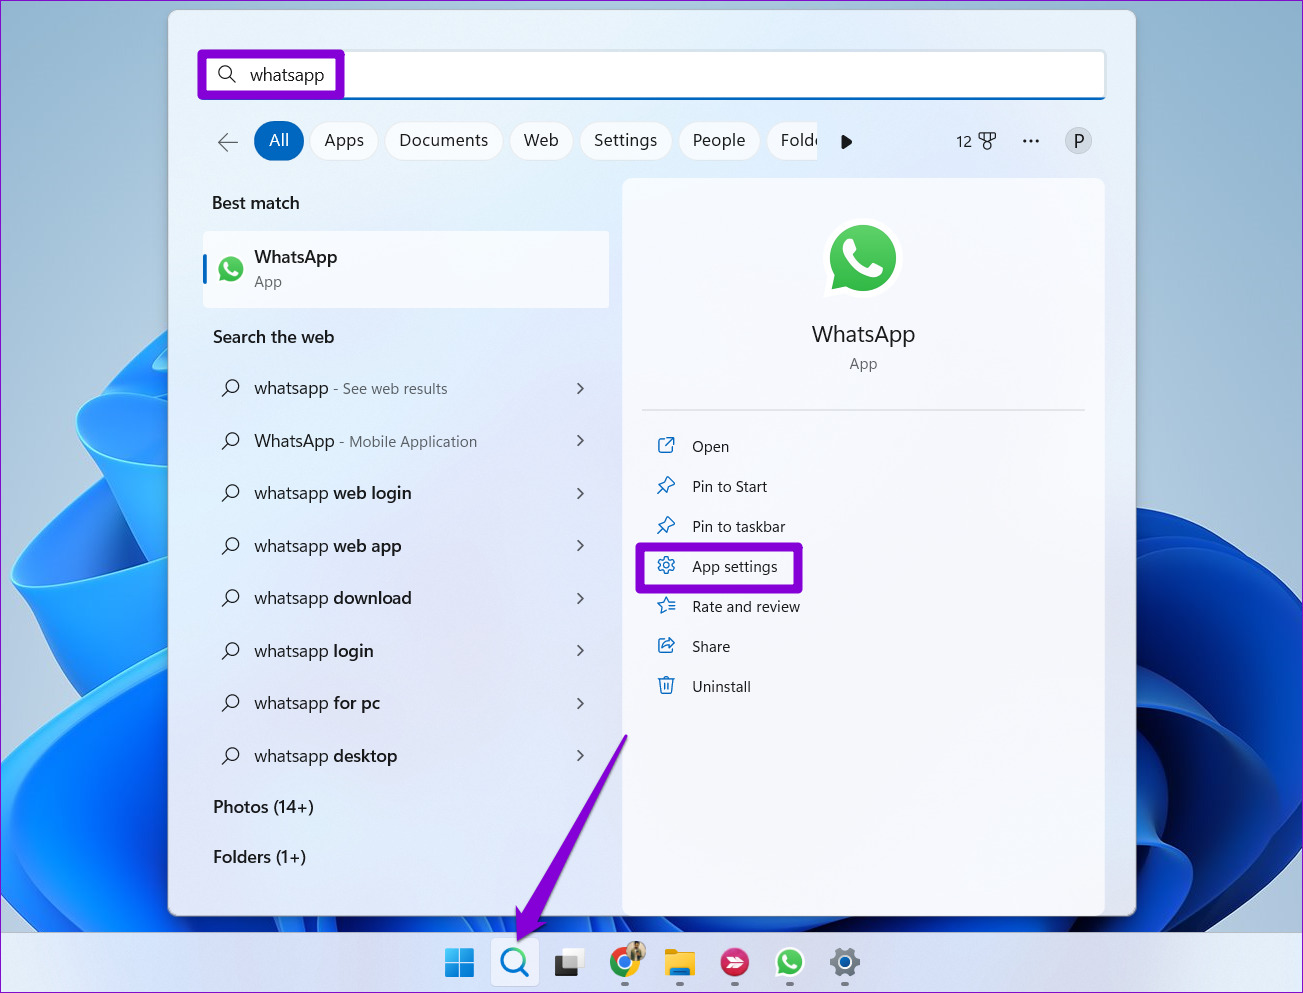
Your Windows 11 PC has a repair feature that you can use when apps like WhatsApp fail to work correctly. Although there are several ways to repair an app on Windows, the easiest one is through the Settings app. Here are the steps you can follow. Step 1: Click on the search icon on the Taskbar or press the Windows key + S to open the search menu. Type WhatsApp in the box and select App settings.
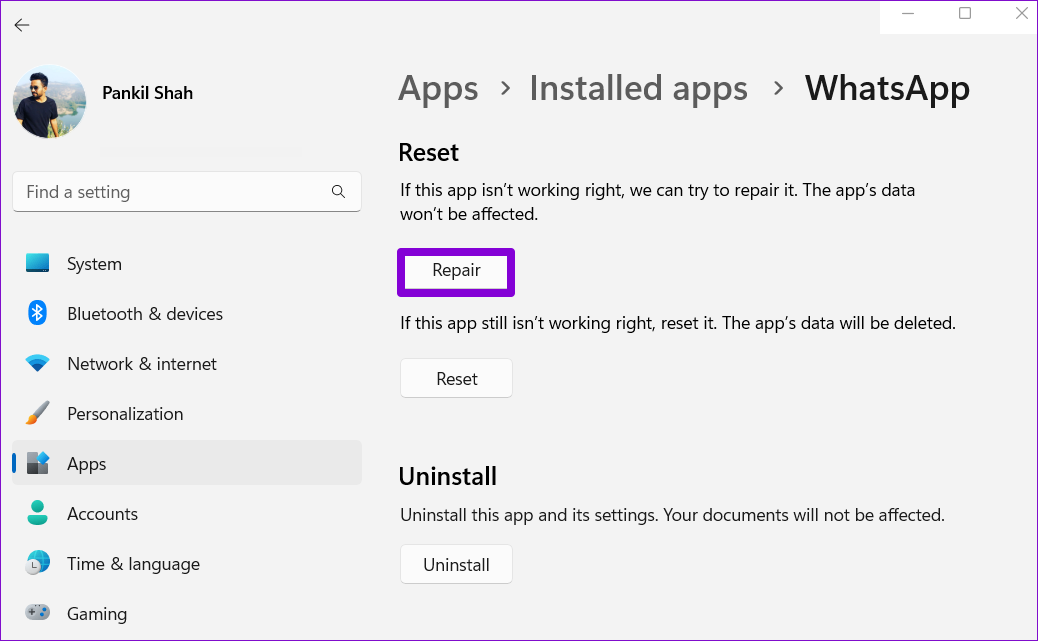
Step 2: Scroll down to the Reset section and click the Repair button.
Check if WhatsApp notifications are working. You can try resetting the app from the same menu if the issue persists. This is as effective as uninstalling the app and installing it again. Note that this process will delete all the app data.
7. Update WhatsApp
Using an outdated version of WhatsApp can also lead to notification issues. So, if none of the above solutions work, you should update WhatsApp from the Microsoft Store as a last resort. WhatsApp for Windows
Get Notified
Such notifications issues often occur due to misconfigured settings or a lack of relevant permissions. Hence, resolving the problem does not take long. However, if you’re experiencing similar issues with other apps, you may need to fix notifications on Windows 11. The above article may contain affiliate links which help support Guiding Tech. However, it does not affect our editorial integrity. The content remains unbiased and authentic.
