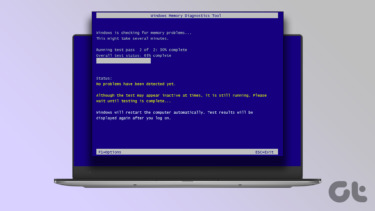
If you also experience the same on your Windows 11 running computer, you can quickly fix it. That said, you’ll only observe this issue once you look for it. That means no apparent indicators hint at the memory leaking problem.
Confirm Memory Leak Issue in Windows 11
Before you go ahead and apply troubleshooting tricks to your computer, you should first confirm the memory leak issue on your PC. Here’s what you need to do. Step 1: Press the Windows key and search for Resource Monitor. Step 2: Hit Enter and open the app. Step 3: Go to the Memory tab. Check the total physical memory on your PC or laptop. Closely check system resources taking up an unusual amount of RAM on the device. As a result, you will have less physical memory in stand-by and free space. Once you identify memory leak issues, go through the tricks below and fix the memory leak on Windows.
1. Close File Explorer Windows
When Windows 11 was released, the first memory leak reports came from the File Explorer app. When you try to open too many File Explorer windows, it will consume a huge RAM on Windows. You should avoid opening too many File Explorer windows. If you already have too many windows opened in Windows, right-click on the File Explorer icon on the Windows 11 Taskbar and select the Close all windows option.
2. Make Changes in the File Explorer
Even after closing File Explorer, it’s likely that your PC still experiences memory leaks. For instance, opening the File Explorer again would consume a lot of memory resources. Use the temporary workaround from the steps below. Step 1: Click the Windows key, type File Explorer Options and hit Enter. Step 3: When the File Explorer Options window opens, go to the View tab. Step 3: Enable Launch folder windows in a separate process. Hit OK at the bottom and it should apply some brakes to File Explorer’s consumption to RAM usage on the computer.
3. Manually Free Up RAM
This might not be the most practical one but it can quickly free up the RAM consumption. We will show you how to use Task Manager to free up RAM on a computer. Step 1: Use Windows + X keys and select the Task Manager option to open it. Step 2: Click on the Memory tab at the top to see which app is consuming a lot of RAM. Step 3: Click on the app and then select the End Task button at the bottom-right. Windows all immediately close the selected task and free up RAM.
4. Close Unnecessary Applications and Browser Tabs
As you continue to open apps and browser tabs on Windows, it will take a good amount of RAM to function properly. Out of habit, most users open apps and forget to close them when the work is done. You should check which apps and browser tabs you don’t need on your PC and close irrelevant ones.
5. Close Apps and Services from Startup
When you have too many apps and services opening during Windows startup, it will take up a considerable amount of RAM in the first place. You should use the Startup menu in Settings and review your current setup. Step 1: Press Windows + I key to open the Settings app. Step 2: Click on the Apps menu. Step 3: Select Startup. Step 4: Check the system impact of each service and disable the ones that you no longer require during startup. For example, most VPN apps automatically open during startup. You may disable them to make your PC boot faster.
6. Update Windows OS
Microsoft continues to roll out update to fix the minor niggles in the Windows 11. So if you’ll need to update it on your PC, especially if you’ve been hold up to install the options. Open the Settings app (Windows + I keys) and head to the Windows Update menu. Click on the Check for Updates button to download the latest OS build on your computer and install it.. After you install the updates, let your computer restart and monitor whether File Explorer or any other app consumes an unusual amount of RAM.
Use Memory Judiciously on Windows
Whether your Windows 11 PC has 8GB RAM or higher RAM, all apps should get a chance to access the RAM appropriately. Unless it’s an incompatible or you’re using an older Windows 11 build, you won’t see the memory leak problem. The above article may contain affiliate links which help support Guiding Tech. However, it does not affect our editorial integrity. The content remains unbiased and authentic.


