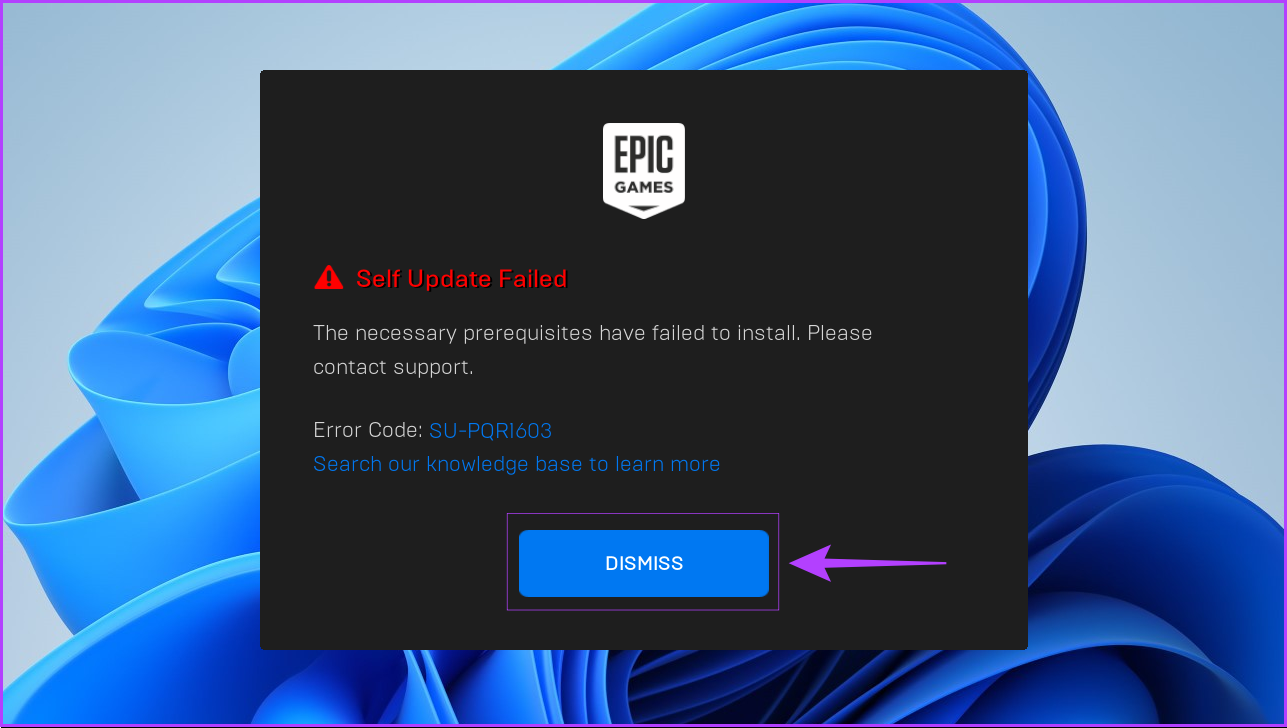
The error specifically hints at needing specific files and libraries pre-installed to ensure the game runs on your Windows PC. Do you get the same error often? Here are the fixes for the ‘necessary prerequisites have failed to install’ error when installing the Epic Games Launcher on Windows.
1. Run the Epic Games Launcher as an Administrator
One of the easiest methods that can be employed to fix the self-update failed error includes running the Epic Games Launcher as an administrator. Here’s how you can run the Epic Games Launcher as an administrator on your Windows PC: Step 1: Click on the Dismiss button to close the current instance of Epic Games Launcher.
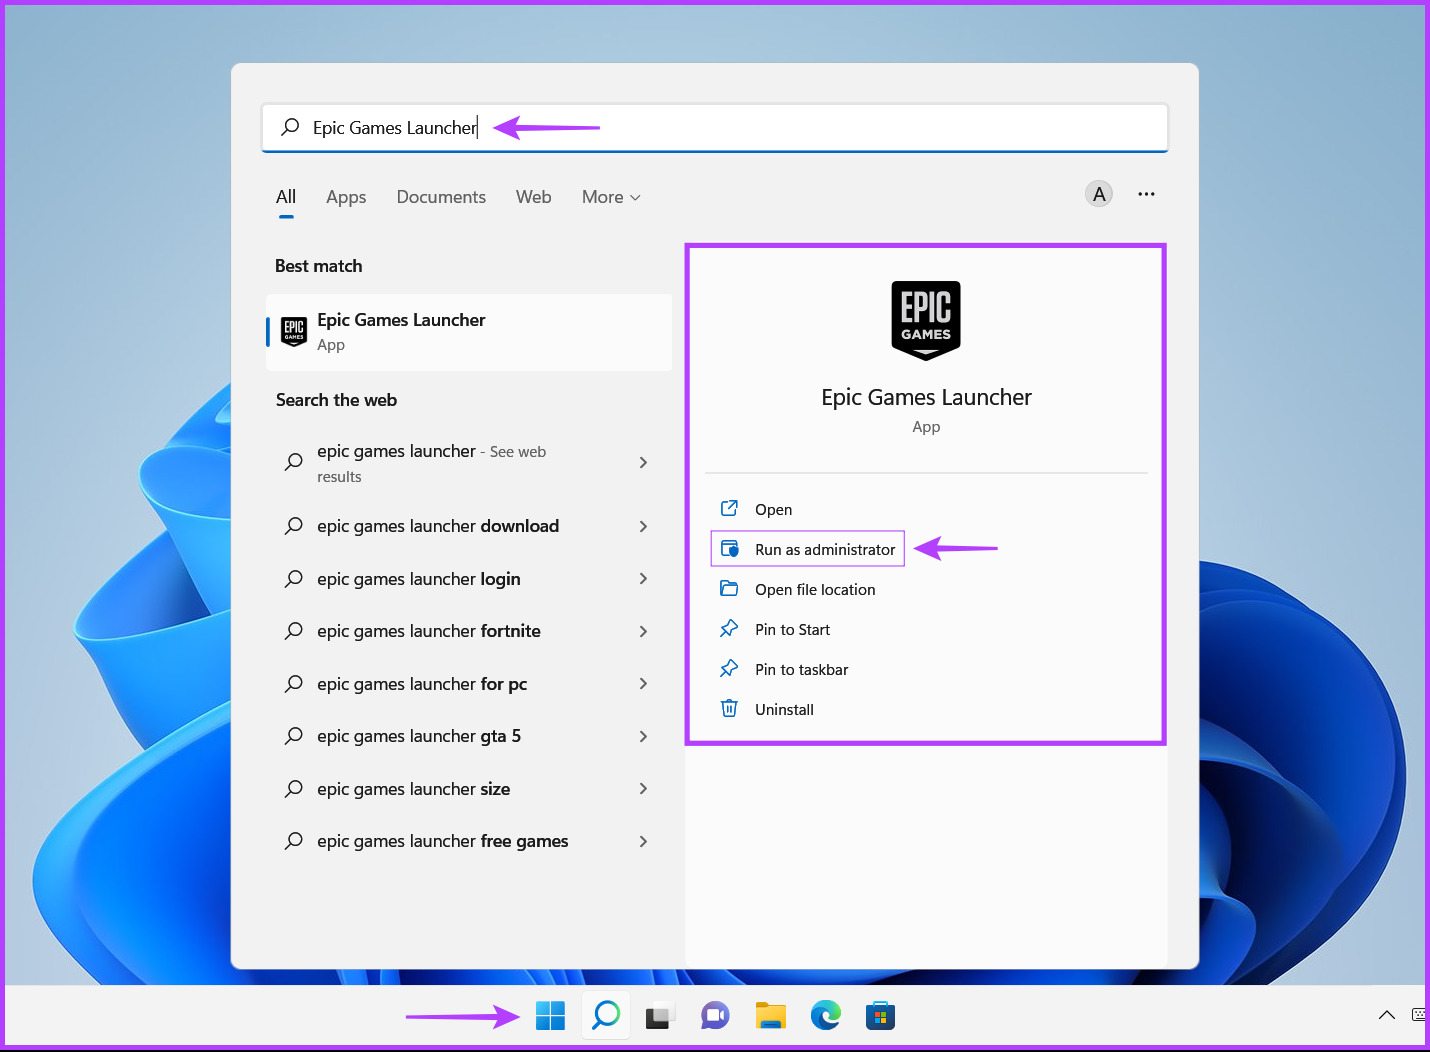
Step 2: Click on Start, type ‘Epic Games Launcher‘ into the search bar, and then choose ‘Run as Administrator from the options listed below the search result.
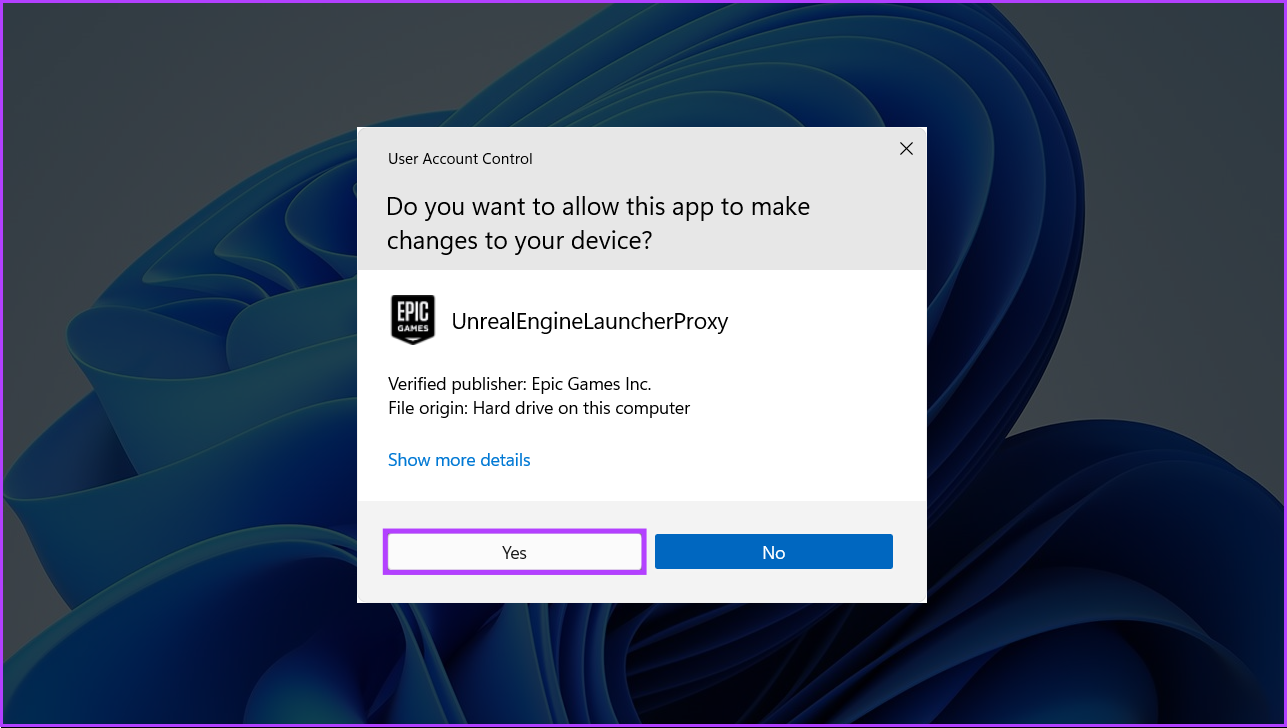
Step 3: Select Yes when a User Account Control (UAC) prompt appears.
Alternatively, suppose you want to launch any application with administrative privileges even more quickly. In that case, you can hold the Shift key while you click on the application or the file you want to access. As soon as you launch the Epic Games Launcher as an administrator, it will automatically reinitiate the self update and the update verification process to install the program on your PC. In case you still encounter the Self Update Failed error, read along as we explain more ways you can employ to fix this annoying error.
2. Confirm You Have Read/Write Access to the Installation Folder
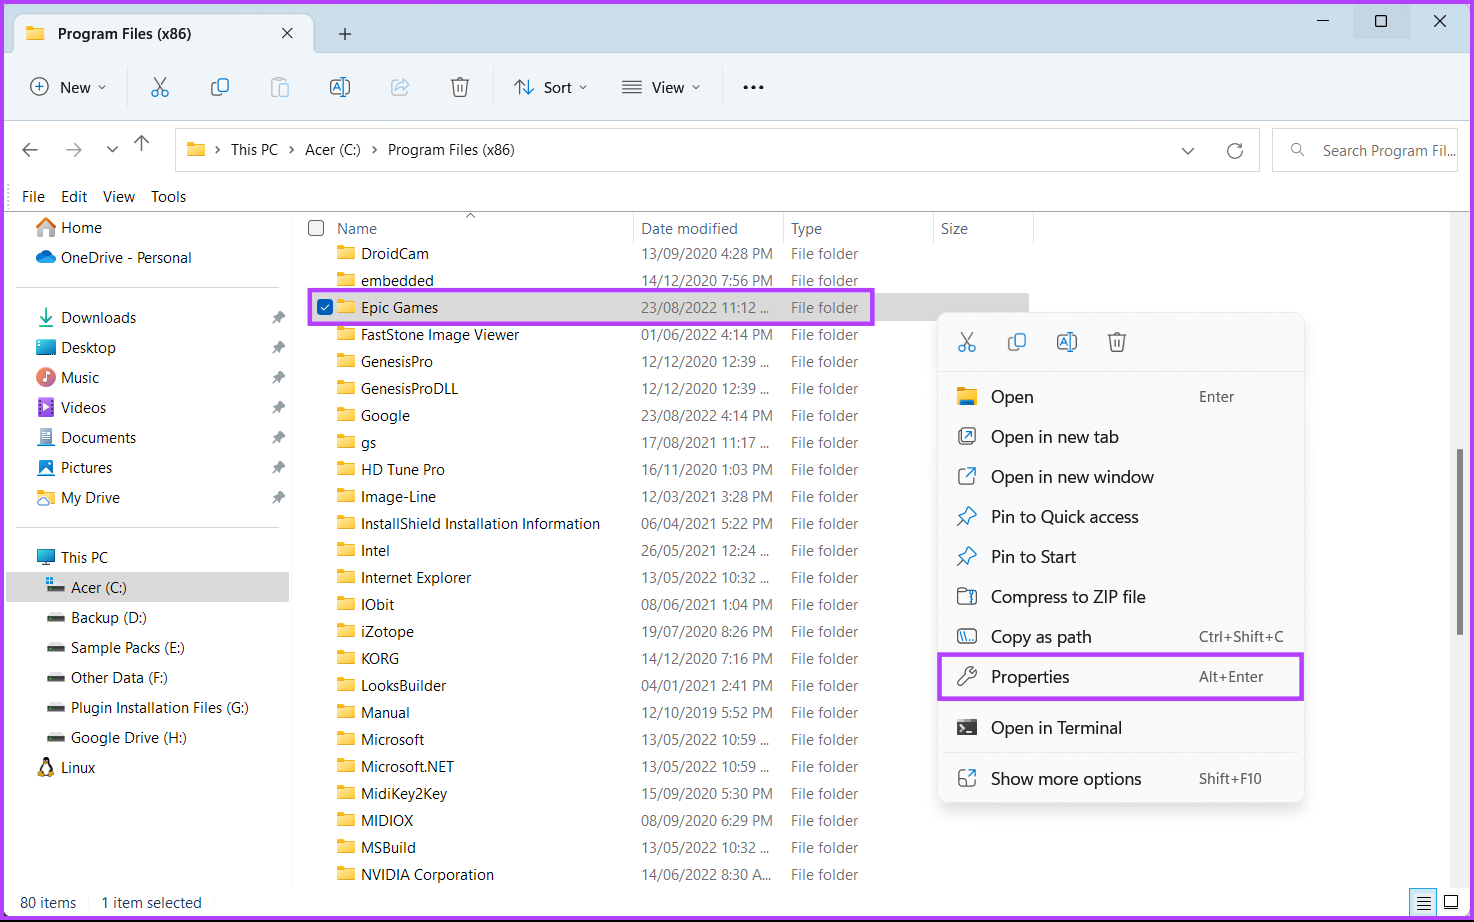
If opening the Epic Games Launcher with elevated privileges didn’t do the trick, you need to check if you have read and write access to the installation folder where the Epic Games Launcher is installed. Here’s how you can confirm if you have read/write access to the Epic Games Launcher’s default installation folder: Step 1: Navigate to C:\Program Files (x86) and look for the Epic Games folder using the File Explorer. Step 2: Right-click on the Epic Games folder and select Properties.
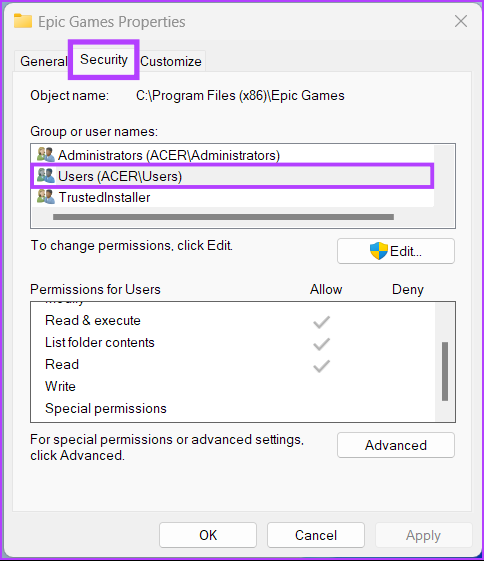
Step 3: Head to the Security tab inside the Epic Games Properties dialog, scroll down in the ‘Group or user names’ section and click on Users.
Step 4: Verify if both the read and write permissions have a checkmark beside them and are allowed in the permissions for users section. If either none or only one is checked, you need to click on the Edit button to change the permissions.
Step 5: Scroll down in the ‘Group or user names’ section, click on Users, allow both the read and write permissions by left-clicking on the little square boxes under allow, then click on Apply.
3. Install or Reinstall the Microsoft Visual C++ Redistributables
Being a third-party app, the Epic Games Launcher requires some specific files to install on your Windows computer. To ensure that most games run on most Windows version, the Epic Games Launcher checks for specific Visual C++ files and libraries. It’s unlikely that you don’t have them installed, but some of these Visual C++ redistributables can be downloaded and installed on your Windows PC. But if there are no files or they’re outdated, it’s a good idea to download these files and install them on your Windows 11 PC. These files will install the Microsoft C and C++ libraries that are utilized by several older games and software. Before you download, make sure that you download the x64 version of these files for your Windows 11 computer. If you’ve a ARM-based device that runs Windows, get the ARM64 version of the files. Also, you will require administrative privileges to install these files. You’ll need to visit Microsoft’s Visual C++ Redistributable page for supported downloads. From there, you’ll need to download the Redistributable packages:
Visual Studio (2015 to 2022) Visual Studio 2013 Visual Studio 2012 Visual Studio 2010 SP1
Visit Microsoft Visual Studio C++ Redistributables Support Page
4. Modify Epic Games Launcher’s Target Parameters
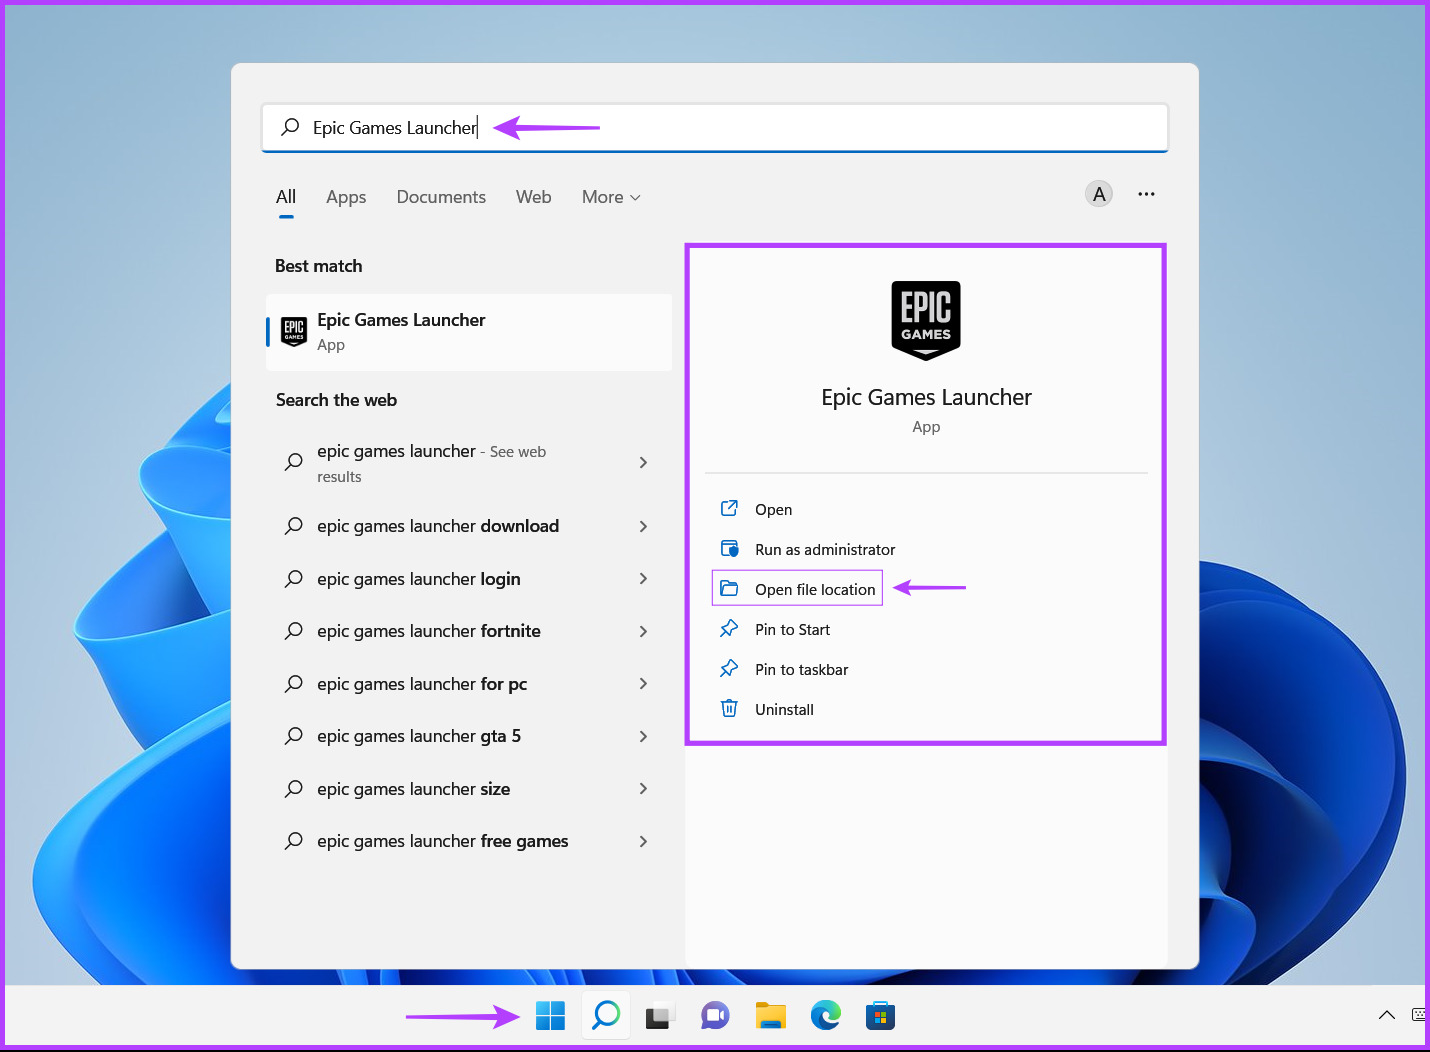
One of the solutions that even Epic Games suggest is to modify the parameters for running the Epic Games Launcher. That might help the launcher to skip the self-update checkup regime it runs whenever you install and launch the Epic Games Launcher for the first time. Here’s how you can easily modify Epic Games Launcher’s target parameters on your Windows 11 PC: Step 1: Head to the start menu, search for Epic Games Launcher and click on the Open File Location option,
Step 2: Right-click on the Epic Games Launcher shortcut and select Properties.
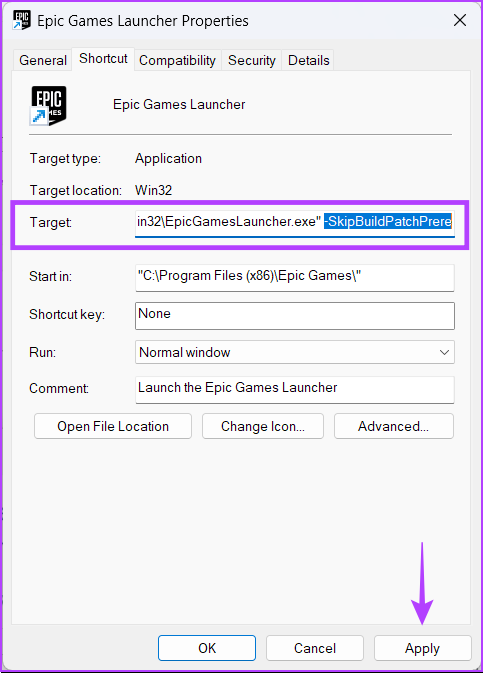
Step 3: Inside the Epic Games Launcher Properties window, add the following text at the end of the section next to Target option and click on Apply.
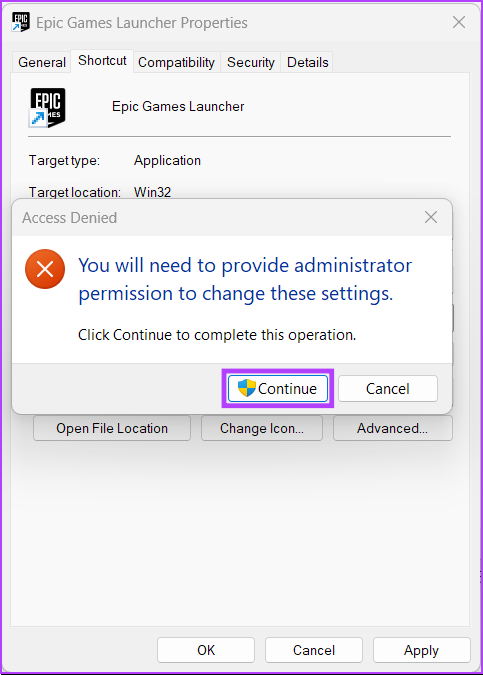
Step 4: Click on Continue button, and click Yes on the User Account Control prompt that appears next.
However, you should note that this solution might affect Epic Game Launcher’s ability to update itself down the line. Hence we recommend you use it as a temporary fix and undo it late if possible. To undo this solution, follow the steps listed above, but instead of adding, you need to remove the -SkipBuildPatchPrereq text that you added at the end of the Target field during step 3.
Start Looking For Your Favourite Games
The solutions mentioned above will help you fix the ‘Necessary prerequisites have failed to install’ error on your Windows 11 PC. If you still can’t install Epic Games Launcher on your Windows 11 computer, try downloading it again over a stable Internet connection. Let us know which solution worked for you in the comments section below.
The above article may contain affiliate links which help support Guiding Tech. However, it does not affect our editorial integrity. The content remains unbiased and authentic.
