But, like most things on the internet, there is a workaround to schedule WhatsApp messages. Just like there is to use two WhatsApp accounts on your iPhone. We will be using the Shortcuts app on iOS to achieve this trick. Android users can check our guide on how to schedule WhatsApp messusers ages on Android.
Why Schedule Messages on WhatsApp
You may want to schedule a WhatsApp message for various reasons. Let’s assume it’s your friend’s birthday the next day, and you want to wish them. But, you don’t want to stay up till midnight. You can schedule a pre-written message on WhatsApp to your friend, which will be sent automatically at midnight.
Scheduling messages is also a good way to respond to a message instantly if you don’t want to respond to a message instantly. You can schedule a message for a later time or date, and your phone will automatically send it even if you are not near your phone.
How to Schedule WhatsApp Messages on Your iPhone
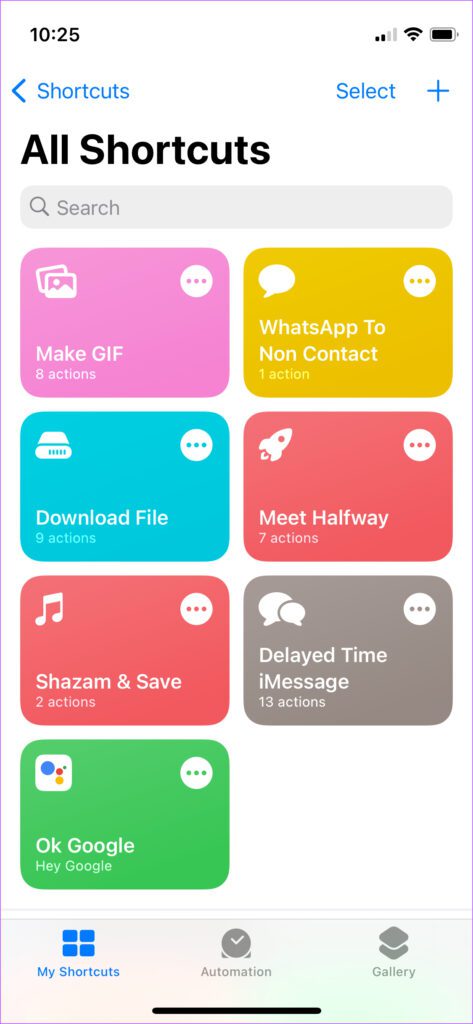
There are several ways to send scheduled WhatsApp messages via your iPhone. The method we are employing involves the Shortcuts app on iOS. This is because Shortcuts is a first-party app straight from Apple and is safe and secure. There is no involvement of a third-party app in this case. Shortcuts are a powerful way to automate tasks on your iPhone. You can use several nifty shortcuts regularly to make things easier while using your iPhone. We will create a custom Shortcut that will send scheduled messages to a selected contact on WhatsApp. Here’s how to create the custom shortcut. Step 1: Open the Shortcuts app on your iPhone. If you don’t have it pre-installed or uninstalled it earlier, head over to the App Store and install it. Get Shortcuts App
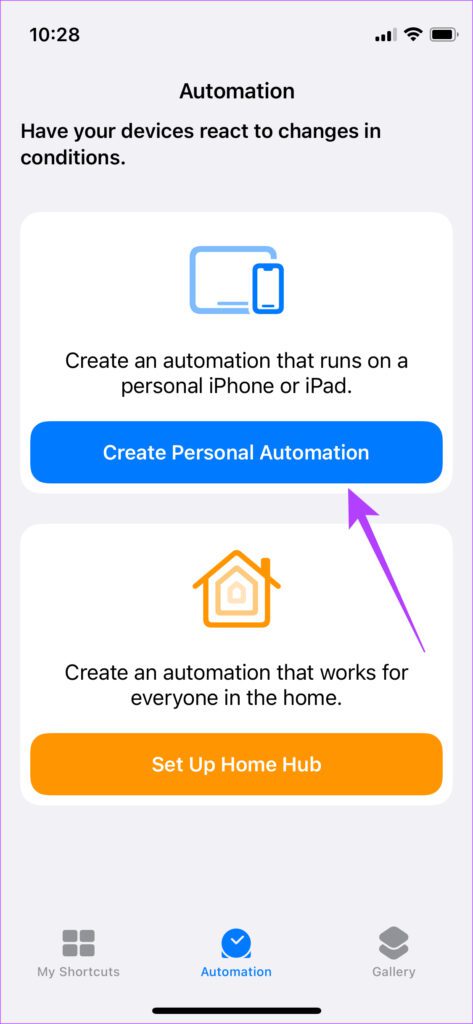
Step 2: Switch to the Automation section using the bar at the bottom.
Step 3: Select Create Personal Automation.
Step 4: Decide the date and time for which you want to schedule your message. After that, tap on Time of Day. You can always change it later.
Step 5: Tap on Time of Day. Tap on the clock displaying the time and change it to the time at which you want to schedule the message. Step 6: Under the Repeat section, select the Monthly option. Now, select the date on which you want to schedule the message.
Step 7: Once you have selected the date and time on which you want to send your scheduled message, tap on Next on the top-right corner. Step 8: Select Add Action.
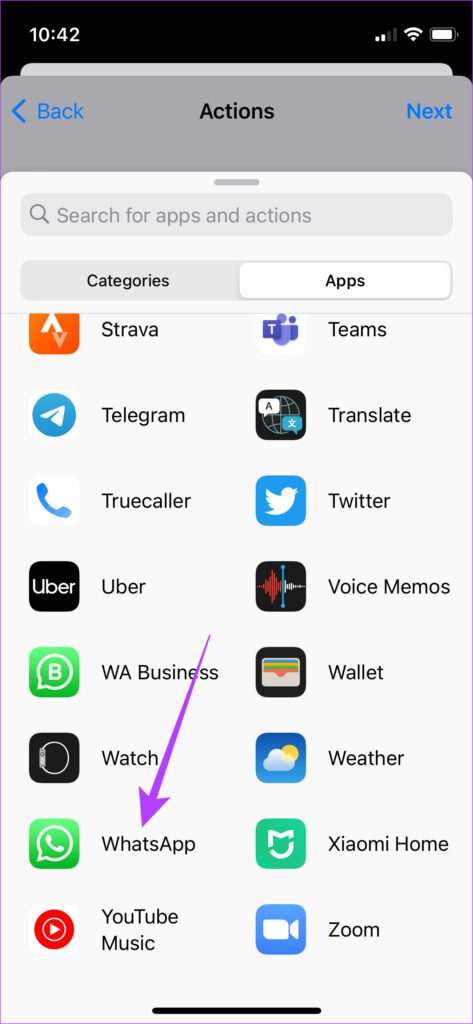
Step 9: Switch to the Apps tab from Categories.
Step 10: Scroll down on your list of apps to find WhatsApp. Tap on it.
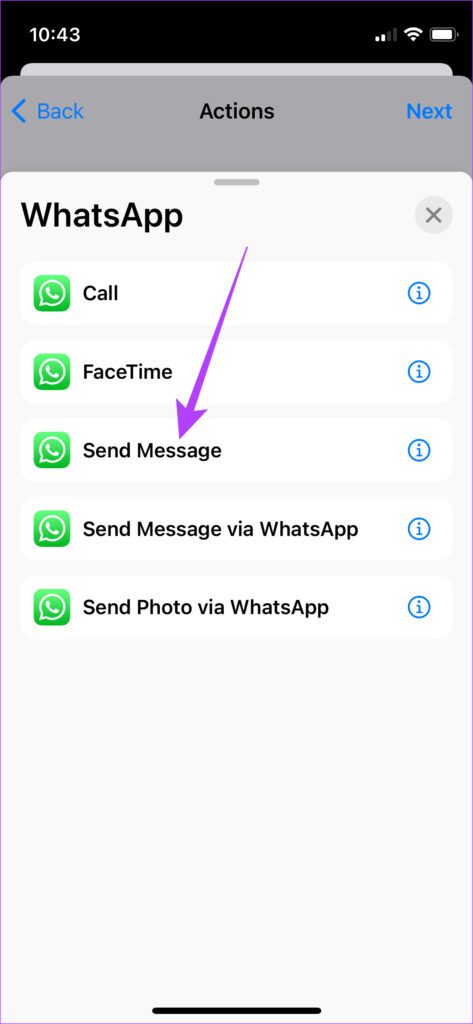
Step 11: Select Send Message. Do not select ‘Send Message via WhatsApp’ – They are two different options.
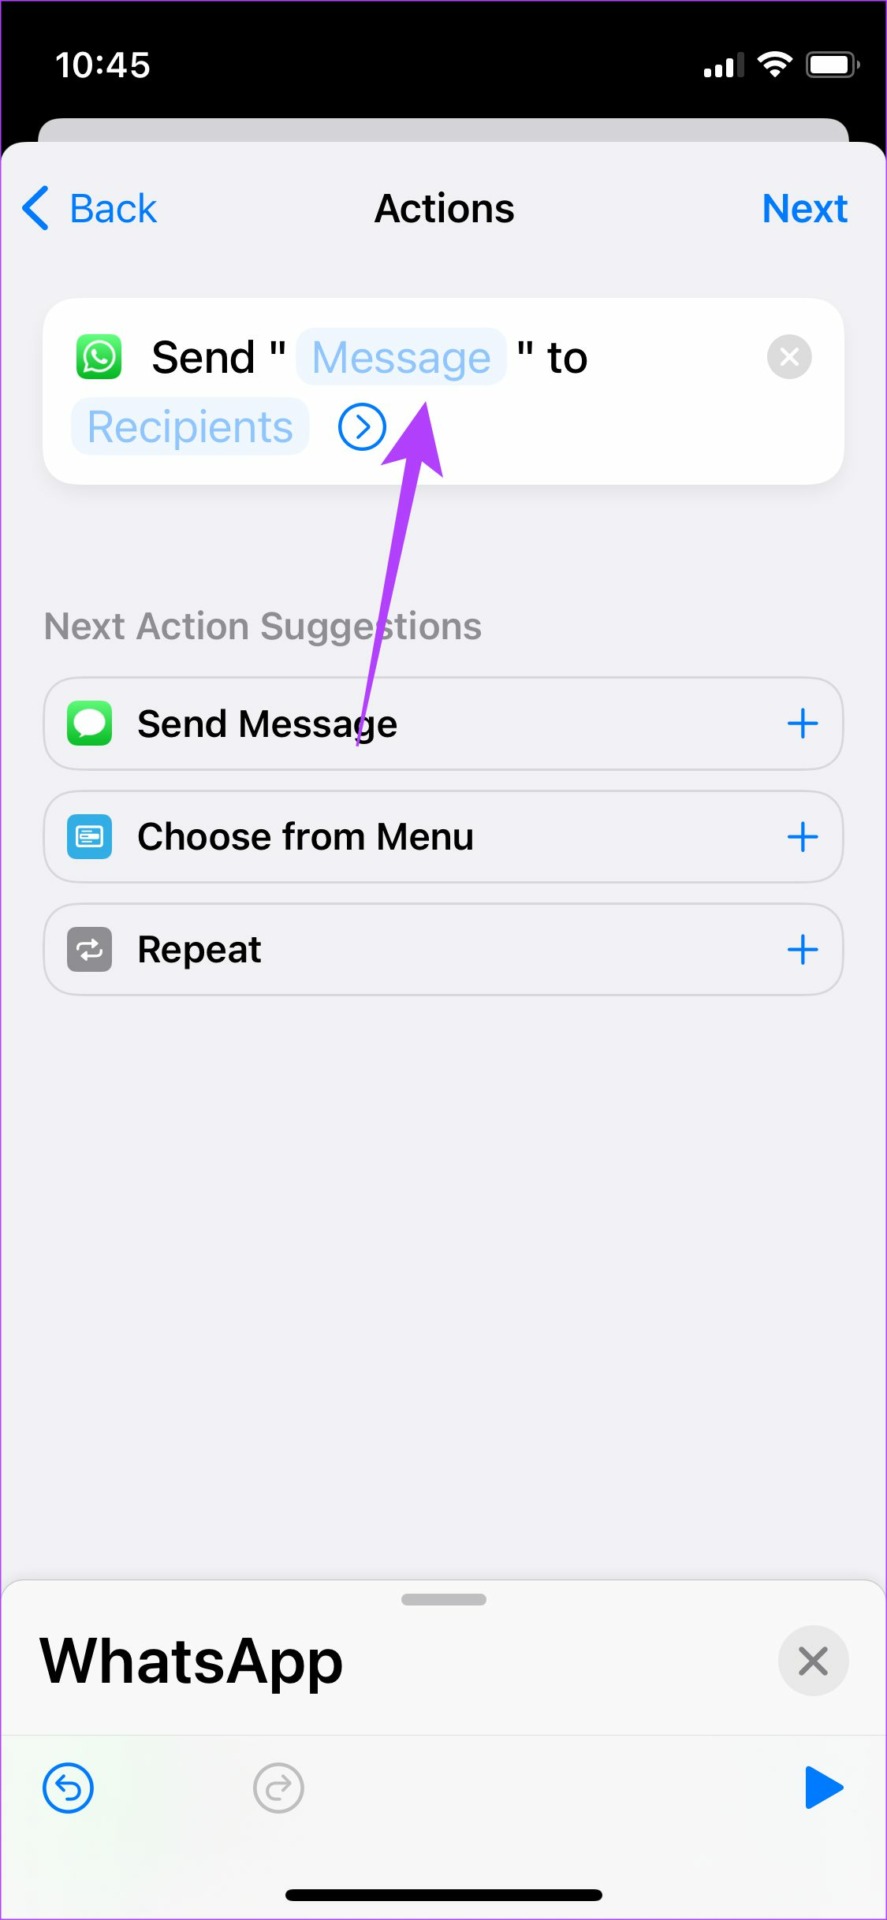
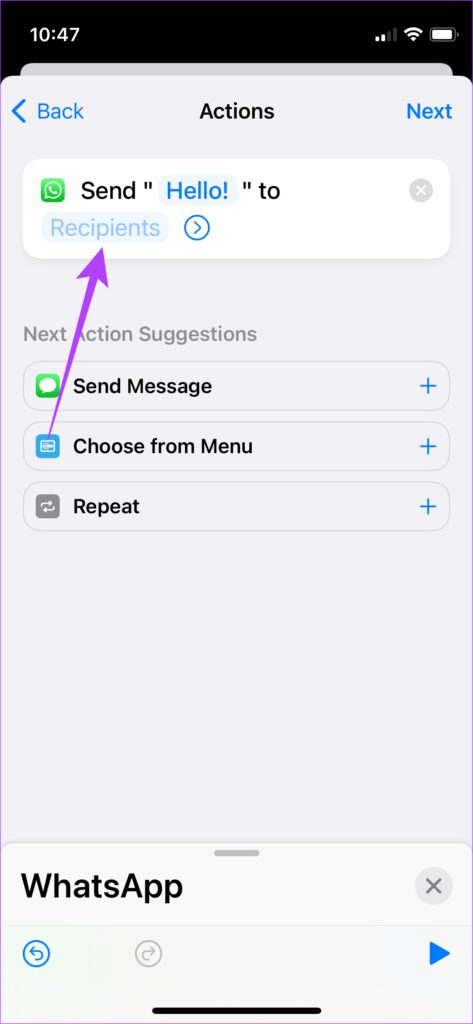
Step 12: Tap on Message and enter the message you want to send. Step 13: Next, tap on Recipients and select the contact you want to send the message to.
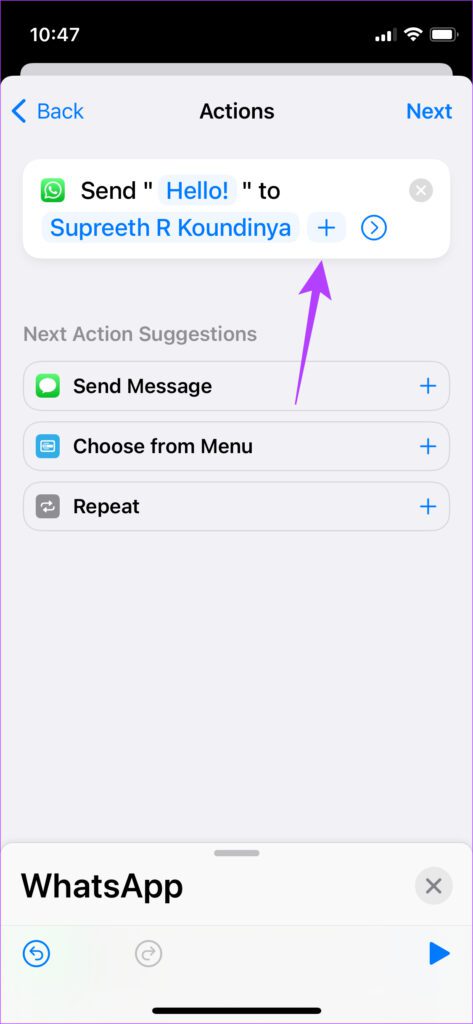
Step 14: You can also add more than one recipient by selecting the ‘+’ icon.
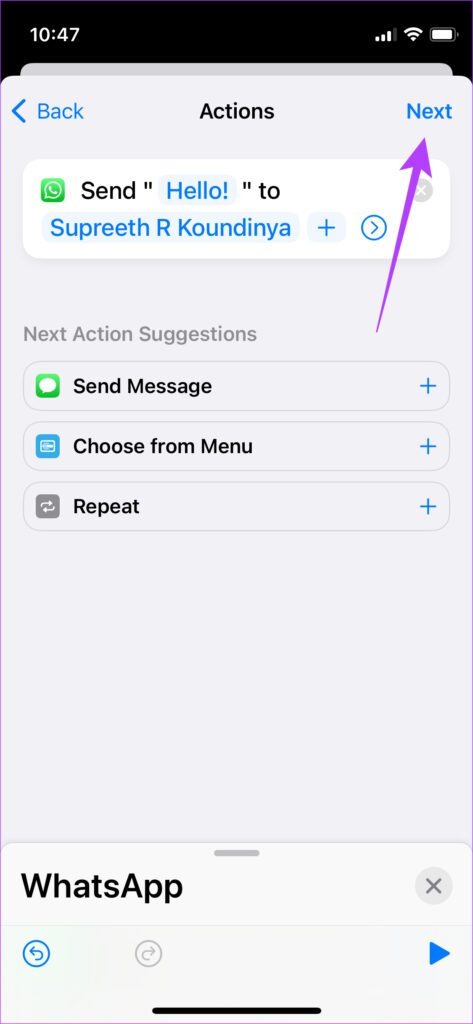
Step 15: Tap on Next in the top-right corner.
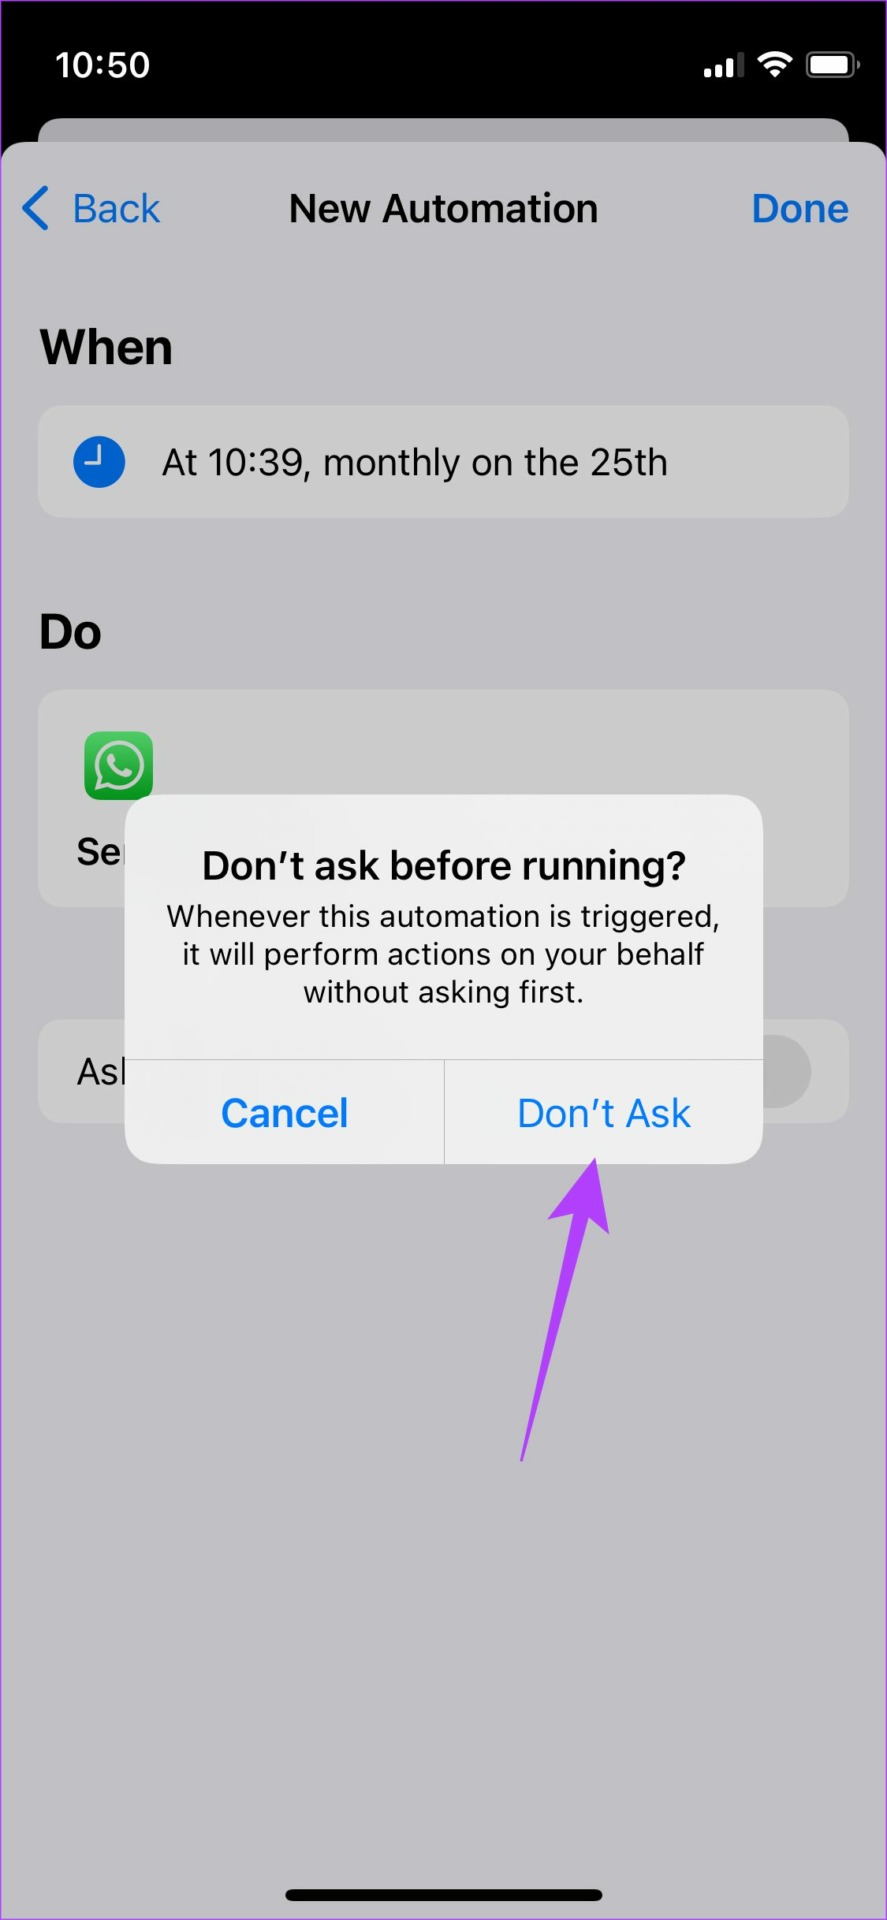
Step 16: Turn off the toggle next to Ask Before Running. This will ensure that the shortcut runs automatically without your confirmation again. When prompted, select Don’t Ask. Step 17: Select Done and your Shortcut will be created.
Your WhatsApp message has now been scheduled. The iPhone will be sent automatically at the chosen date and time. It’s important to perform one more step to make sure your scheduled message isn’t sent every month to your contact. Step 1: Wait for the selected date and time for your scheduled message to be sent. Once it has been sent, open the Shortcuts app on your iPhone.
Step 2: Switch to the Automation section using the bar at the bottom.
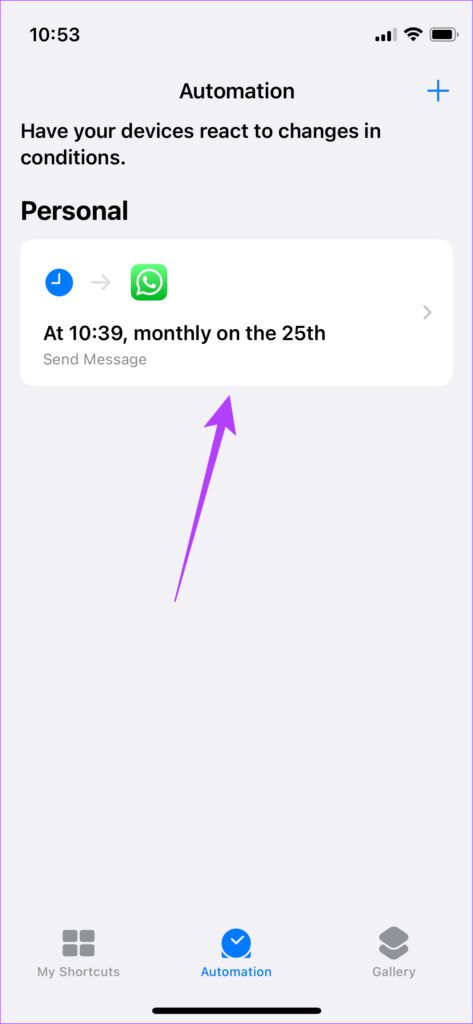
Step 3: You will see your automation.
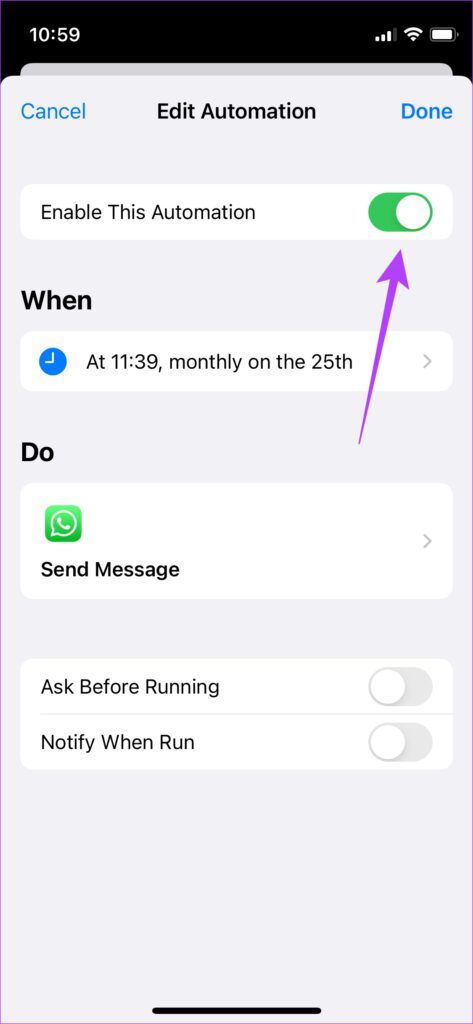
Step 4: Tap on it and turn off the toggle next to Enable This Automation.
How to Edit the Shortcut to Schedule a Different Message
Now that you have created the automation, you won’t have to redo the entire process every time you want to schedule a WhatsApp message on your iPhone. Here’s what you need to do. Step 1: Wait for the selected date and time for your scheduled message to be sent. Once it has been sent, open the Shortcuts app on your iPhone.
Step 2: Switch to the Automation section using the bar at the bottom.
Step 3: You will see the automation you had created.
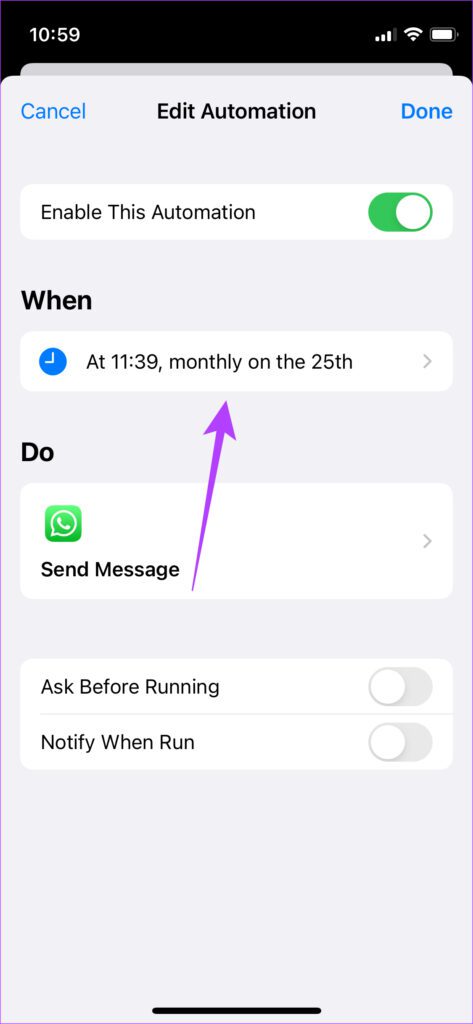
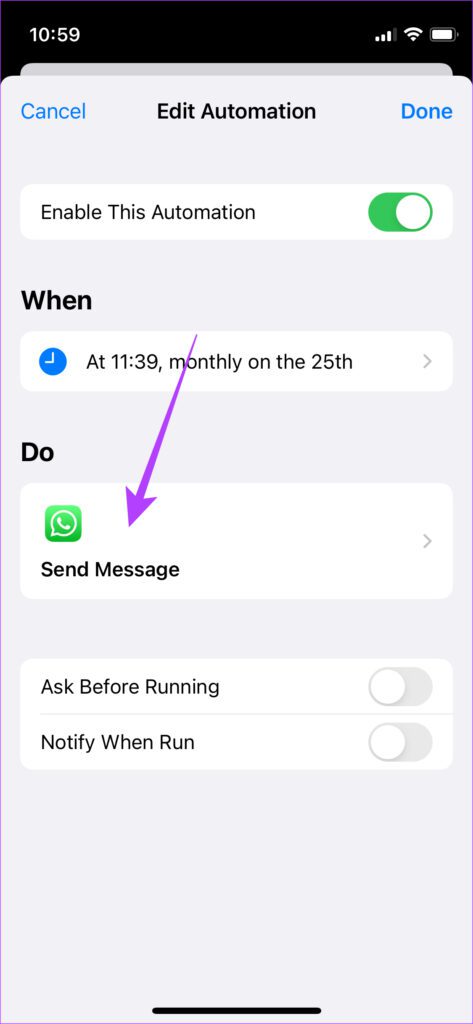
Step 4: Tap on it. Select the row under When.
Step 5: Input the date and time you want to schedule the new message. Once done, tap on Back.
Step 6: Now, select the section under Do.
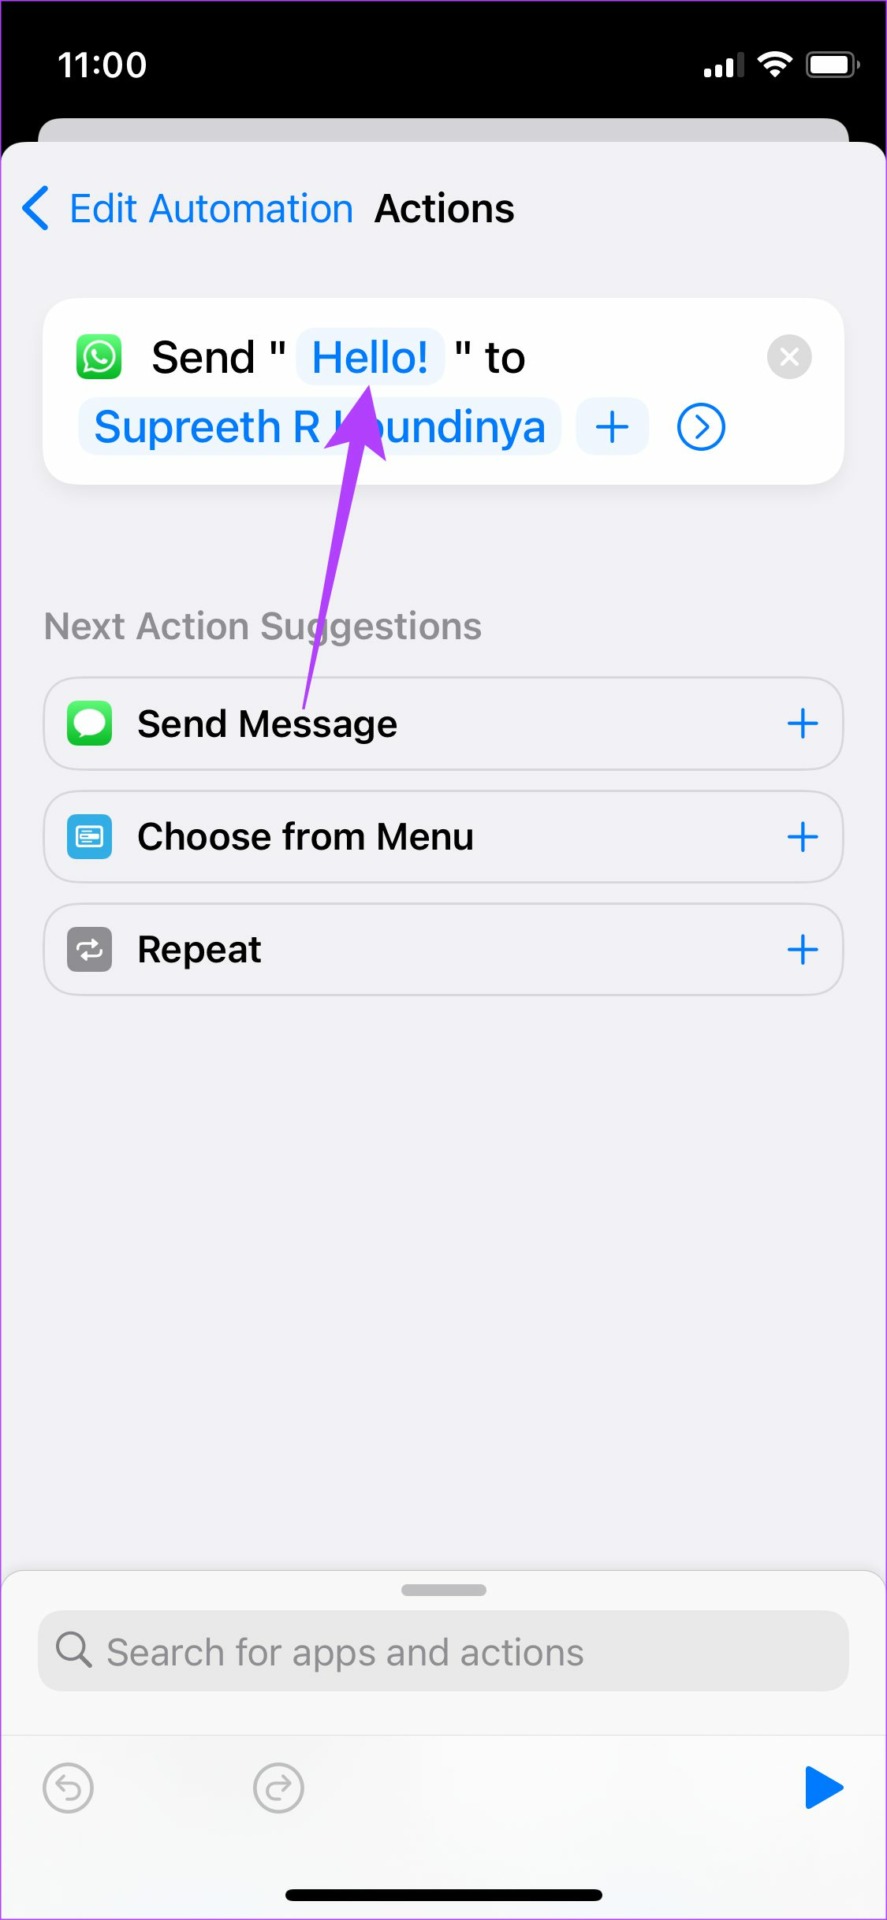
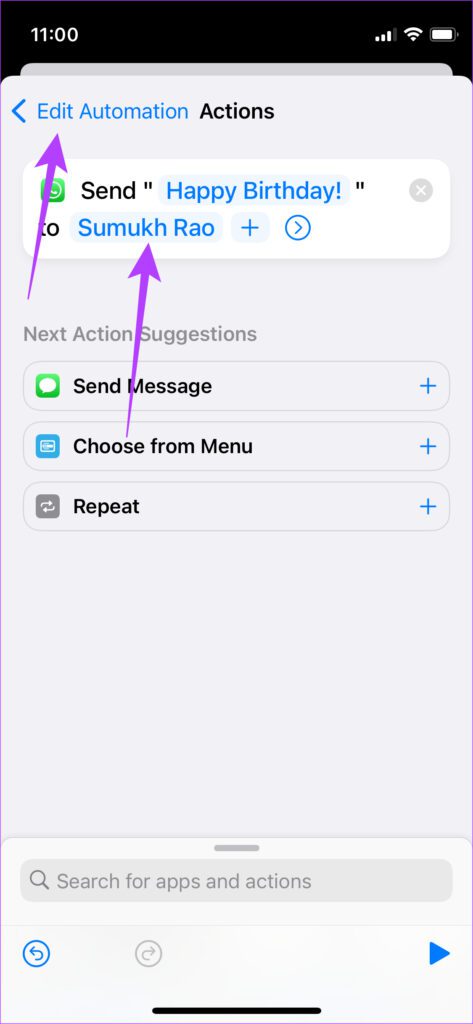
Step 7: Tap on the message you had entered earlier to change it. Step 8: Tap on the recipient’s name to change it.
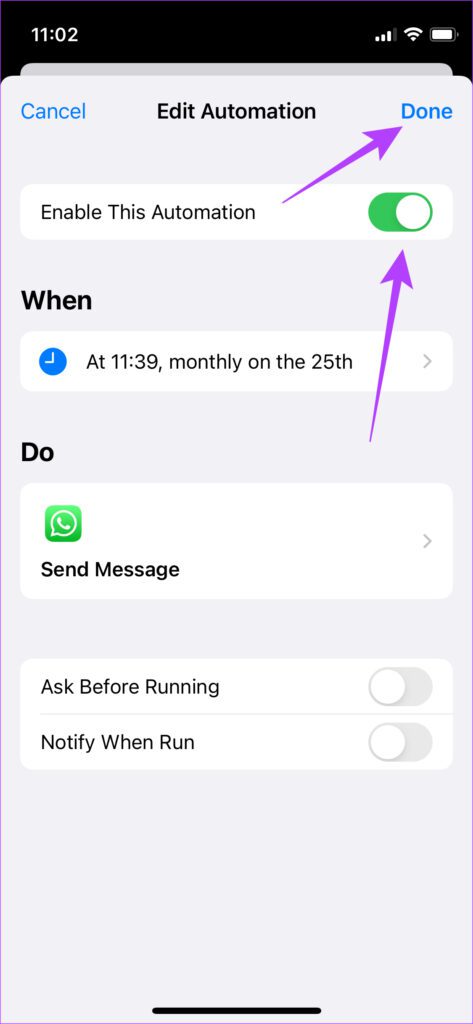
Step 9: Select the arrow on the top-left corner to go back. Step 10: Once all the edits have been made, turn on the toggle next to Enable This Automation.
Step 11: Tap on Done. The iOS will scheduled your new message for the chosen date and time to the respective recipient(s). Once your message has been sent, follow the steps above to end the automation to avoid repetitive messages being sent.
Schedule and Send Whatsapp Messages From Your iPhone
The initial setup might seem quite intimidating, but it’s quite easy to edit it and send scheduled messages whenever you want once you set up the automation. The above article may contain affiliate links which help support Guiding Tech. However, it does not affect our editorial integrity. The content remains unbiased and authentic.
