The Office clipboard saves multiple copied items (up to 24) at once. If you have any Microsoft Office apps (Outlook, Word, PowerPoint, Excel, etc.) on your PC, you can make the best of this clipboard. A good thing about this is the clipboard is easily accessible across Office products. For example, the content you copy from Microsoft Word and save to the clipboard is also accessible in PowerPoint. Here’s what you’ll need to do to access and use the Office clipboard on your computer.
How to Access the Office Clipboard
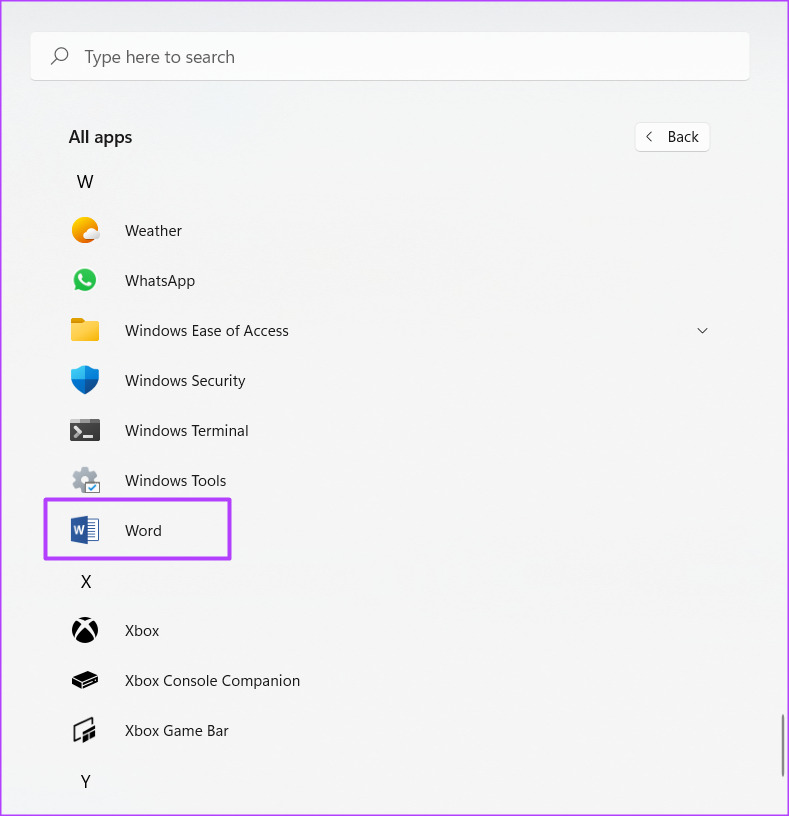
Using the Office Clipboard, you can save texts from an email, data from a spreadsheet, and even graphics from an online source. When you open the clipboard on any Office product, it appears as a task pane. To access the Office Clipboard, here are the steps to follow. Step 1: On your PC, search for any Microsoft Office app by clicking on the Start menu.
For illustrative purposes, we will be using Microsoft Word. However, you can easily replicate the steps on other Office products. Step 2: Click on the Microsoft Office app to open it.
Step 3: On the Microsoft Office Ribbon, click on the Home tab.
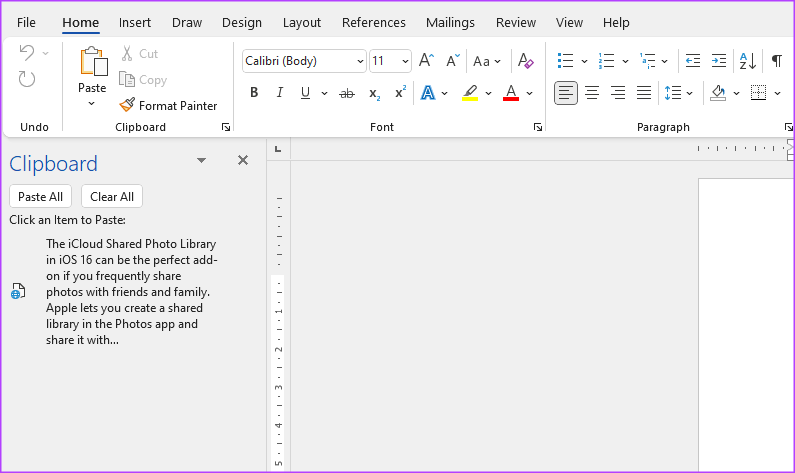
Step 4: On the Home tab, look for the Clipboard group and click the dialog box launcher (downwards arrow) beside it to open the Clipboard task pane.
The clipboard task pane will open blank if you haven’t copied any items. So, when you copy items, the Clipboard task pane should fill up until it contains its maximum 24 items.
How to Copy and Paste Items on the Office Clipboard
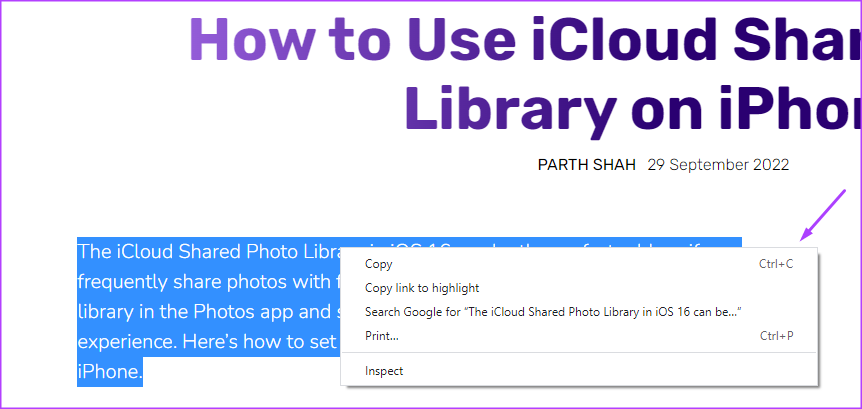
To fill up the Office Clipboard, you can copy and cut items to reflect on it. To do so, follow the steps below: Step 1: Open the document containing the item to be copied. For illustrative purposes, we will copy text from the Guiding Tech website. Step 2: Highlight the content you want to copy.
Step 3: Right-click the highlighted content to open up a menu.
Step 4: Select Copy from the options shown.
Step 5: Go back to the Microsoft Office app. For illustrative purposes, we will make use of Microsoft Word.
However, you can easily replicate the steps on other Office products. Step 6: On the Microsoft Word Ribbon, click on the Home tab.
Step 7: In the Home tab, look for the Clipboard group and click the dialog box launcher beside it to open the Clipboard task pane.
Step 8: Check the Clipboard task pane for the item copied.
Without having to paste the item yourself, you should see that the copied item is already on your Office Clipboard. Step 9: To paste the copied items on an Office product, click any of the items as shown on the Clipboard task pane. To paste all copied items at a go, click Paste All.
How to Delete Items From the Office Clipboard
As you copy items, the Office Clipboard gradually stores them until it reaches its limit of 24 items. When this happens, the clipboard can no longer save your items. To clear up space, you will need to delete items from the Office Clipboard. Here’s how to do so: Step 1: On the Microsoft Word Ribbon, click the Home tab.
Step 2: In the Home tab, look for the Clipboard group and click the dialog box launcher beside it to open the Clipboard task pane.
Step 3: Check the Clipboard task pane for all items copied. Step 4: To delete just one item from the Clipboard, hover your cursor and click the drop-down beside it.
Step 5: Click the Delete option from the drop-down.
Step 6: To delete all the Clipboard items, click Clear All at the top of the Clipboard task pane.
Using the Windows Clipboard History
The Windows Clipboard should not be mistaken for the Office Clipboard. The Office Clipboard is particular to just Office products and enables the transfer of content across products. However, the Windows Clipboard stores copied items from all apps on your Windows PC. However, it only copies and stores one item at a time. To view previously copied items, you will need to view your Windows Clipboard History. The above article may contain affiliate links which help support Guiding Tech. However, it does not affect our editorial integrity. The content remains unbiased and authentic.
