However, removing the startup password on Windows 11 isn’t ideal. Of course, it eliminates one extra step when logging into your PC and makes logging into your Windows 11 PC efficient. But it also puts your computer’s security in jeopardy. If you still wish to stick to your decision, we will discuss all the aspects of disabling passwords in Windows 11 in this article. Let’s begin.
1. How to Remove Login Password on Windows 11 Using User Accounts Panel
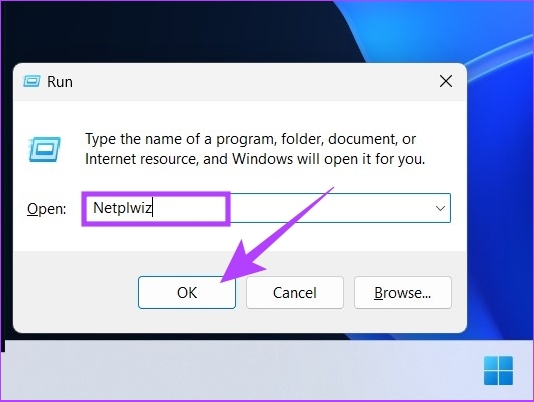
This is one of the most commonly used methods for removing the login password in Windows 11. Follow the steps below. Step 1: Press the Windows button on your keyboard, type Run, and click on Open. Tip: You can also press the ‘Windows key + R’ to open the Run command.
Step 2: Type the below-mentioned command in the text field and click on OK.
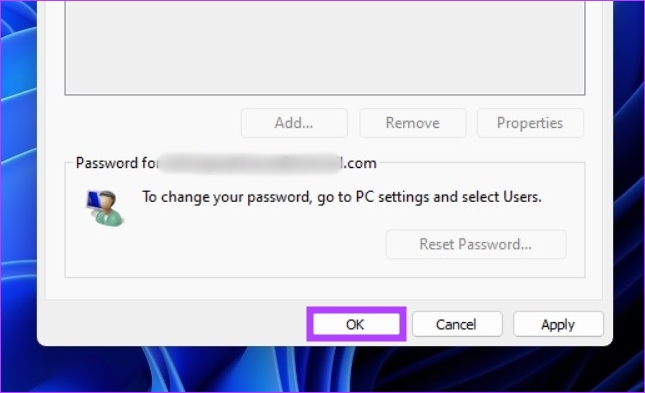
This will bring up the User Account window where you can remove the password. Step 3: Uncheck the ‘Users must enter a username and password to use this computer’ option and click on Apply. Note: If you have multiple accounts, select the user name from which you want to remove the password.
Step 4: Confirm your Microsoft Account information by entering the password twice and clicking on OK.
Step 5: Hit OK again to confirm.
And with this, Windows will remove the password associated with the selected account. In the end, restart your computer for the changes to take effect. You will no longer have to enter the account password when you log in. Well, there is another way to remove the password. Continue reading.
2. How to Turn Off Login Password on Windows 11 Using Registry Editor
The steps in this method may look complex but they are pretty simple to execute. Follow the step-by-step instructions. Step 1: Press the Windows key on your keyboard, type Registry Editor, and click on Run as administrator. Alternatively, you can open Registry Editor using the Run dialog box with the ‘Windows key + R’ shortcut, type regedit, and click on OK.
In the prompt, select Yes. Step 2: Enter the following path in the address bar and press Enter.
Step 3: In the right panel, right-click on the DefaultUserName string and select Modify. Note: If you didn’t find one, you would have to create one manually by right-clicking on the blank area > selecting New > clicking String Value > naming the string as DefaultUserName > double-clicking on it > choosing Modify.
Step 4: In the Value data section, type the username of the account and click on OK.
Step 5: Create another string (using the method mentioned above) and name it DefaultPassword.
Step 6: Double-click on DefaultPassword, enter the account password in the Value data field, and click on OK.
Step 7: Navigate to the AutoAdminLogon string (create it if you can’t find it). Right-click and click on Modify.
Step 8: Now, change the Value data from 0 to 1 and click OK.
Restart your computer to apply the changes. And when your Windows 11 PC turns back on, you get a password-free login.
3. How to Disable Login Password on Windows 11 Using Local Account
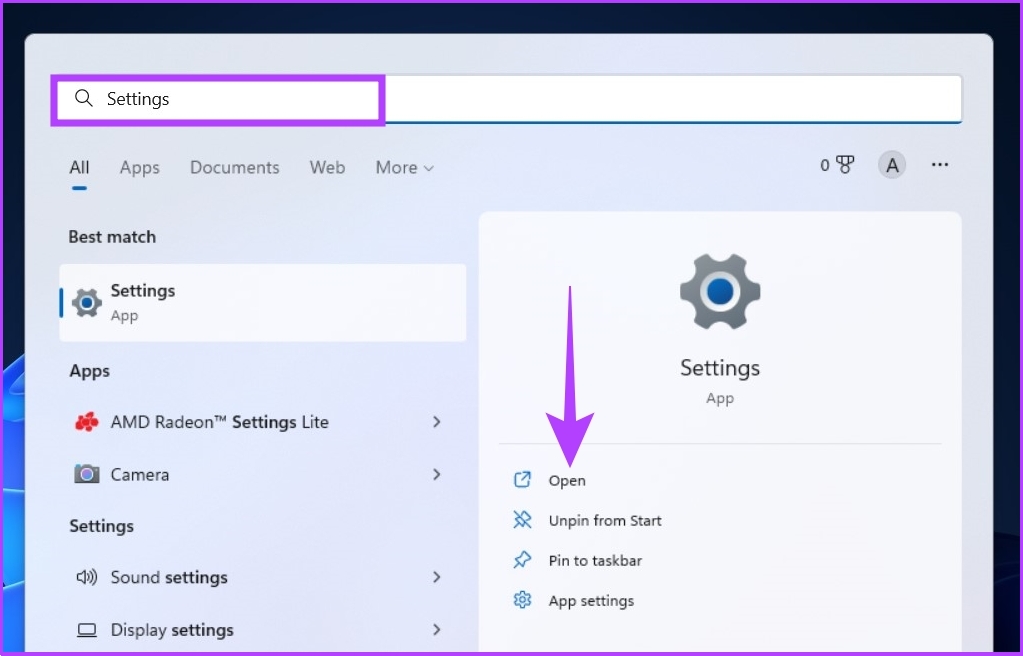
This is a straightforward method to remove the Windows password. Considering that you already have a local account with a set password. Let’s jump into the steps. Step 1: Press the Windows key on your keyboard, type Settings, and click on Open.
Step 2: Go to Accounts.
Step 3: Click on the ‘Sign-in options.’
Step 4: Scroll down to find the Password option, expand it, and click Change.
Step 5: Now, enter your current password and click on Next.
Step 6: The next screen will prompt you to create a new password, but since we don’t need one, leave everything blank and click on Next.
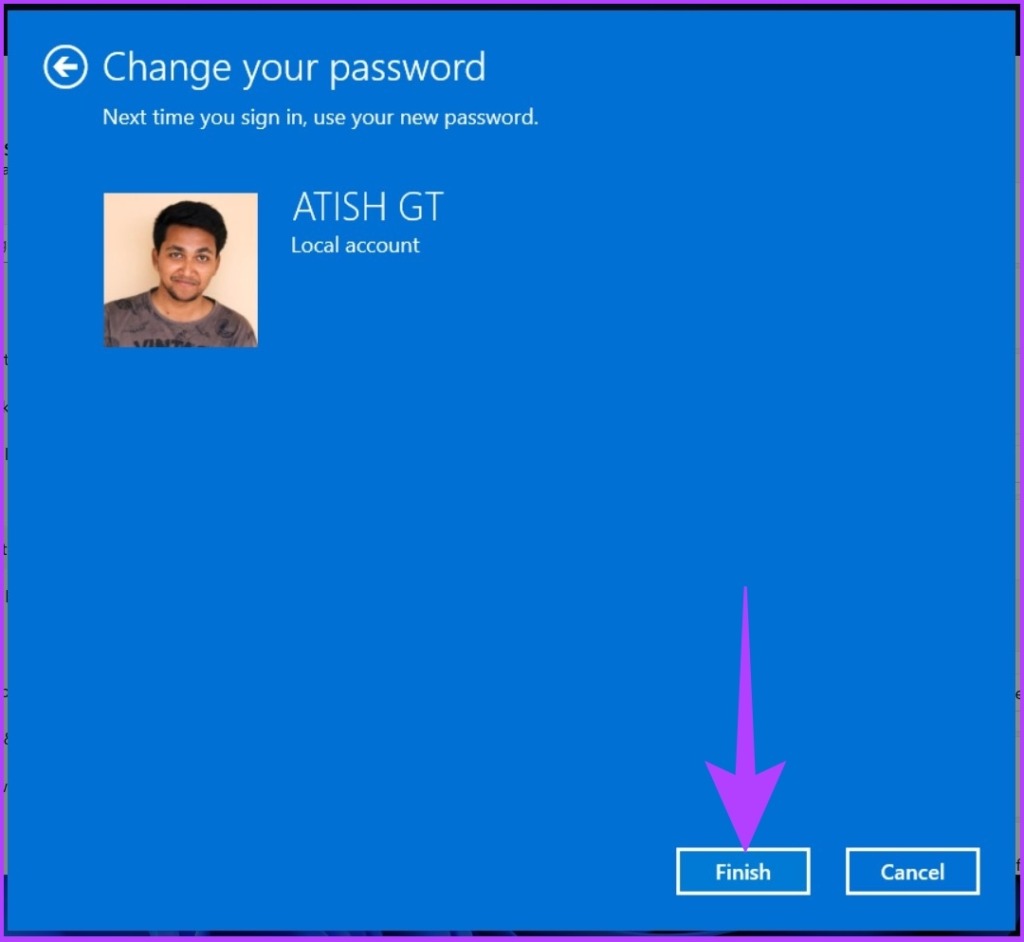
Step 7: Finally, click on Finish.
There you have it. You have successfully removed your login password from the local user account. Next time you turn on your Windows 11 PC, you don’t have to enter the password. When it asks for the password, just press Enter. If you don’t have a local account, you can easily set it up.
How to Create a Local Account
This is quite important to know because, with a local account, you will lose a few Microsoft Services, and won’t be able to access the personalized settings attached to your Microsoft account. If these settings don’t bother you, follow these steps. Step 1: Press the Windows key on your keyboard, type Settings, and click on Open.
Step 2: Go to Accounts.
Step 3: Click on Your Info in the right panel.
Step 4: Under Account settings, click on ‘Sign in with a local account instead.’
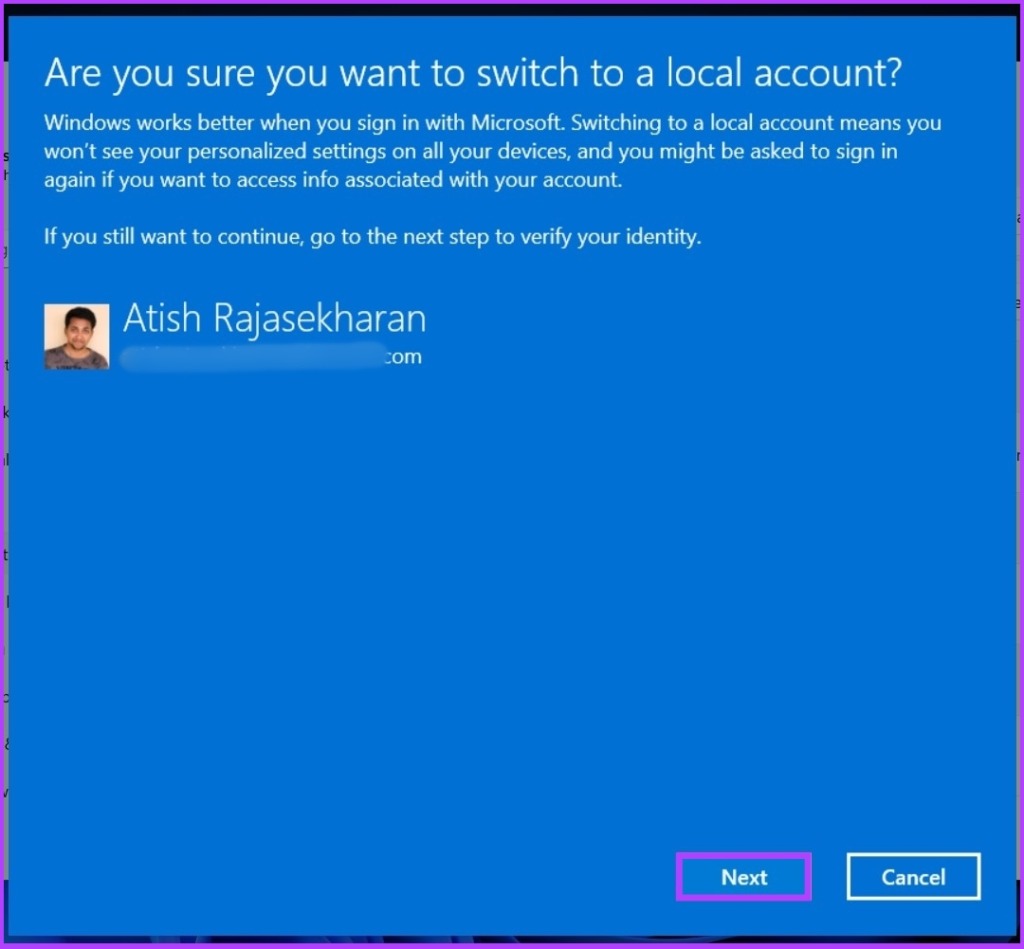
Step 5: In the prompt ‘Are you sure you want to switch to a local account?,’ click on Next.
Step 6: Now, enter your current password and click on OK.
Step 7: Create a new username and leave the password field blank and click on Next.
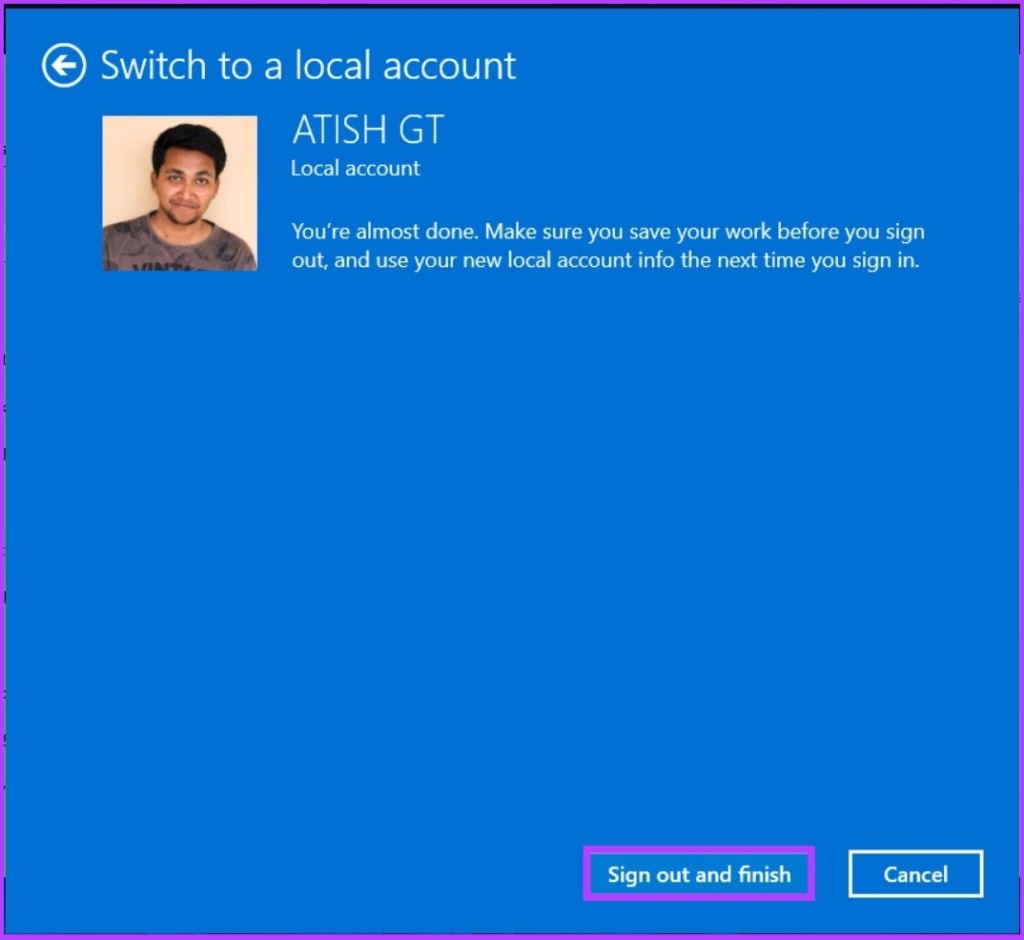
Step 8: Click on ‘Sign out and finish.’
This way, you have created a local account with which you can log in to your Windows 11 PC without any authentication.
4. How to Disable Password Using Windows Terminal
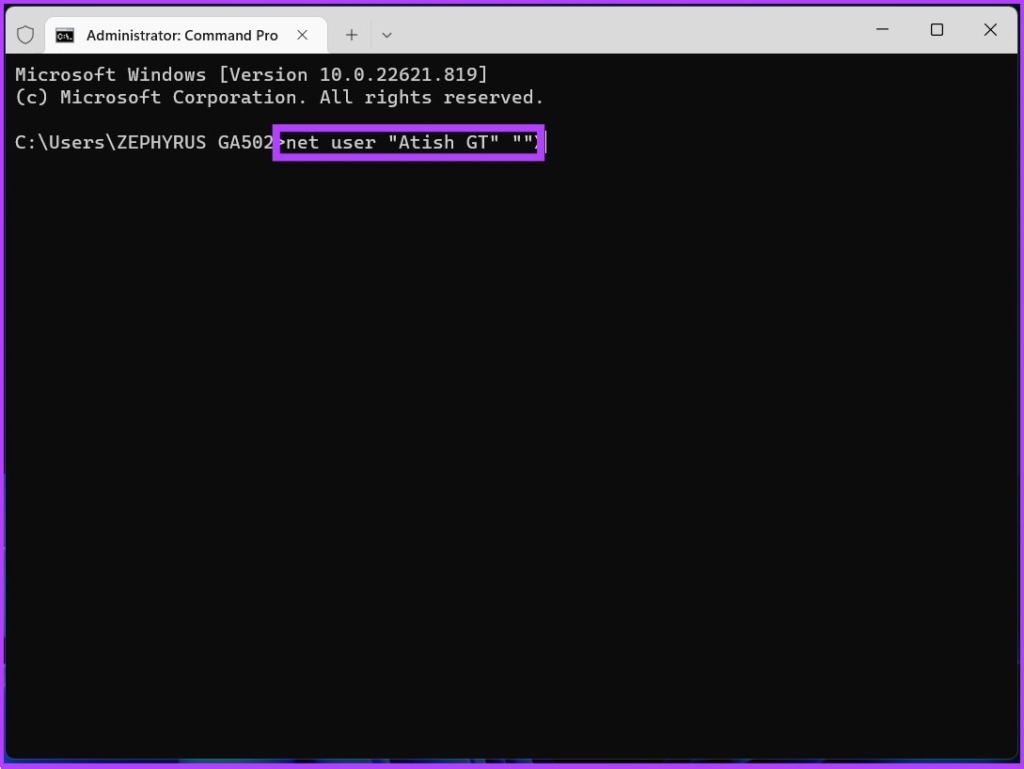
This is one of the quickest ways to disable passwords on Windows 11. It only takes one line to remove your account password. Let’s begin with the steps. Step 1: Press ‘Windows key + X’ to open the Windows context menu and click on Terminal (Admin).
In the prompt, select Yes. Step 2: Type the below command into the Windows Terminal. Note: Replace USERNAME with your username.
There you go. The password that was linked to the username has been taken away, so you can easily log in without having to remember or type in the password. Now that you have removed the password, it is necessary to understand what can go wrong with your Windows 11 PC.
Why Shouldn’t You Remove the Windows Login Password
One significant, if not the only significant, reason you shouldn’t remove your Windows 11 password is that it is the only barrier preventing unauthorized users from taking over your computer and having access to all your files and folders. If you have folders encrypted using BitLocker, your data is somewhat protected. Not having a password is fine if you are keeping your Windows 11 PC somewhere you know you can trust, such as at home or in your personal workspace. However, if you work from a co-working space or on a laptop, it is highly recommended that you not get rid of a password on your Windows 11 PC. Moreover, programs like Google Chrome store your sensitive data such as passwords, credit card details, and so on. So, without a password on your computer, anyone can access it. It is not worth taking this huge risk for easy accessibility.
Smooth and Efficient Manoeuvre
Now, you know different ways to remove passwords on Windows 11. You can choose the method that is most convenient for you. And with the steps well implemented, you won’t have to enter the password when you log in to your Windows 11 PC next time. The above article may contain affiliate links which help support Guiding Tech. However, it does not affect our editorial integrity. The content remains unbiased and authentic.
